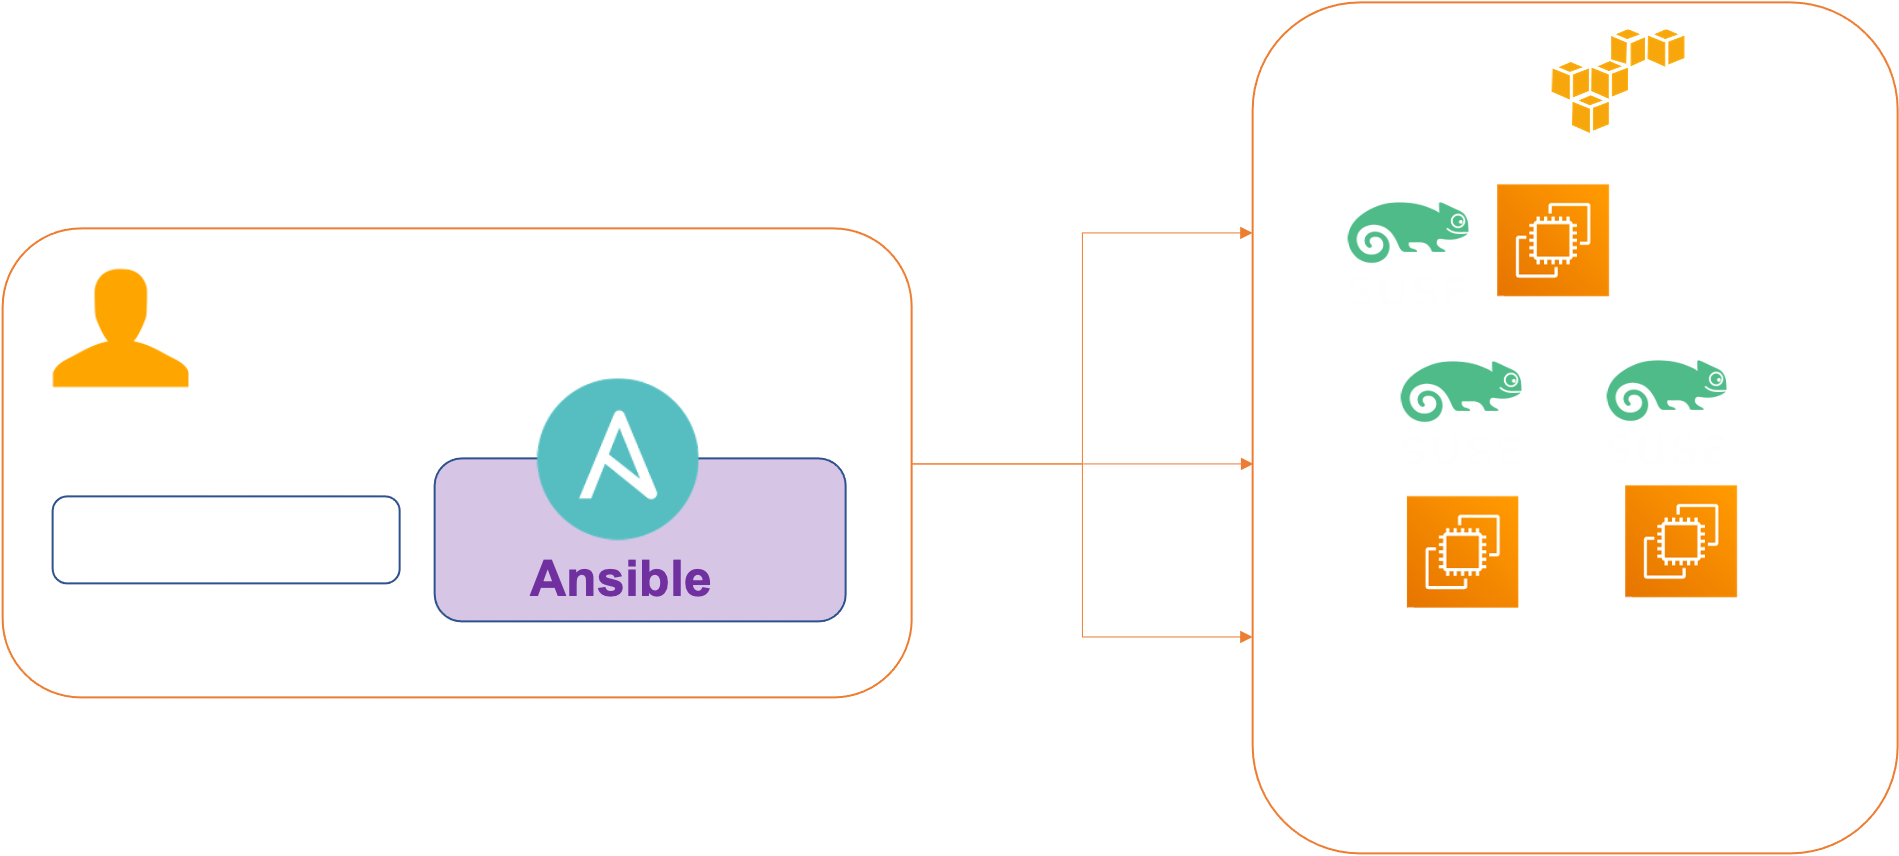
The purpose of this tutorial is to create 3 identical OpenSUSE Tumbleweed virtual machines in AWS that we will deploy only with Ansible. With the goal of using this infrastrucutre to deploy a kubernetes cluster .
What is AWS EC2 ?
Amazon Elastic Compute Cloud (Amazon EC2) is a web service that provides secure, resizable compute capacity in the cloud. It is designed to make web-scale cloud computing easier for developers.
What is Ansible ?
Ansible is a software tool that provides simple but powerful automation for cross-platform computer support. It is primarily intended for IT professionals, who use it for application deployment, updates on workstations and servers, cloud provisioning, configuration management, intra-service orchestration, and nearly anything a systems administrator does on a weekly or daily basis. Ansible doesn’t depend on agent software and has no additional security infrastructure, so it’s easy to deploy.
Architecture
We will create 3 VMs :
- master-node-0
- worker-node-0
- worker-node-1

Prerequisites
Before you get started, you’ll need to have these things:
- Ansible > 4.5.x
- amazon.aws Ansible module installed (for the installation run this command : ansible-galaxy collection install amazon.aws )
- AWS key-pair Create a key pair using Amazon EC2
- An AWS account with the IAM permissions
- A AWS subnet defined
- AWS CLI : the AWS CLI Documentation
- YQ tools installed in your local admin
You can download all the necessary files on this link :  or Clone the repository :
git clone https://github.com/colussim/ansible-aws-k8s.git
Initial setup
Creating Ansible Role
Create one workspace, let’s say AWS-K8s. Go inside this workspace and create one folder called roles and ssh-keys. Copy your WS key-pair file in directory ssh-keys.(in this example my file is named admin.pem and my key admin)
%:> mkdir AWS-K8s
%:> mkdir AWS-K8s/roles
%:> mkdir AWS-K8s/ssh-key
%:>
Now go inside this folder and run these below mentioned commands.
%:> cd AWS-K8s/roles
%:> ansible-galaxy init ec2
%:> - Role ec2 was created successfully
%:>
Setting up Ansible Configuration File
In Ansible we have two types of configuration files: Global or Local. We will create a local configuration file in the AWS-K8s folder and all the Ansible commands we want to run in future, we will run them in this folder.
Create your ansible.cfg file with the following content:
[defaults]
host_key_checking=False
ansible.host_key_checking = false
command_warnings=False
deprecation_warnings=False
ask_pass=False
roles_path= ./roles
force_valid_group_names = ignore
private_key_file= ./ssh-keys/admin.pem
remote_user=ec2-user
inventory=hosts
I will not detail the entries in this file because I assume you know Ansible, just some details:
the default remote user of the EC2 instance is ec2-user.
Creating Ansible Vault to store the AWS Credentials
Run this command :
%:> ansible-vault create awscred.yml
New Vault password:
Confirm New Vault password:
%:>
This command will ask to provide one vault password and then it will open the VI editor on Linux, create two variables in this file and put your AWS access key and secret key as values.
the content of the file will have the following entries :
aws_access_key_id : ABCDEFGHIJK
aws_secret_access_key : Nn0/ABCDEFGHIJK
EC2 role configuration
Setup a variables configuration file for EC2 role
Edit file roles/ec2/vars/main.yml and insert the following lines (replace the different values of the variables with your own):
---
# vars file for ec2
cluster_tag: k8s02
master_tag: Master01
type_tag: worker
workers_tag:
 - Worker01
 - Worker02

sg_name: sg-0028373b0a03be478
region_name: us-east-1
vpc_subnet_id: subnet-0cdb62d501c73f8ca
ami_id: ami-04ec8d1d72a81ee63
keypair: admin
instance_flavour: t3a.xlarge
I have defined 3 variables tags (cluster_tag,master_tag,workers_tag ) which will be useful for filtering when listing instances
Setup EC2 role task file
Edit file roles/ec2/tasks/main.yml and insert the following lines :
---
- name: launch Master Node on AWS cloud
  ec2:
         key_name: "{ { keypair  } }"
         instance_type: "{ { instance_flavour }}"
         image: "{ { ami_id } }"
         wait: yes
         count: 1
         vpc_subnet_id: "{ { vpc_subnet_id } }"
         group_id: "{ { sg_name } }"
         assign_public_ip: yes
         region: "{ { region_name } }"
         state: present
         aws_access_key: "{ { aws_access_key_id } }"
         aws_secret_key: "{ { aws_secret_access_key } }"
         instance_tags:
           Name: "{ { master_tag } }"
           Cluster: "{ { cluster_tag }} "
           Role: "master"
- name: launch Worker Node on AWS cloud
  ec2:
          key_name: "{ { keypair } }"
          instance_type: "{ { instance_flavour } }"
          image: "{ { ami_id } }"
          wait: yes
          count: 1
          vpc_subnet_id: "{ { vpc_subnet_id } }"
          group_id: "{ { sg_name } }"
          assign_public_ip: yes
          region: "{ { region_name } }"
          state: present
          aws_access_key: "{ { aws_access_key_id } }"
          aws_secret_key: "{ { aws_secret_access_key } }"
          instance_tags:
            Name: "{ { item } }"
            Cluster: "{ { cluster_tag } }"
            Role: "worker"
  loop: ""
In this file nothing particular I insert the name of my variables defined previously. I use the ec2 module to launch instance on AWS. I used 3 tags for each instance (Name, Cluster and Role), which are defined in our roles/ec2/vars/main.yml file
Create a file setup_ec2.yml in our local directory , It will execute the ec2 role :
#:> vi setup_ec2.ymland insert the following lines :
- hosts: localhost
  remote_user: root
  vars_files:
    - awscred.yml
  tasks:
    - name: Running EC2 Role
      include_role:
        name: ec2
Execute the role EC2
Run this command to start the playbook execution, you will be asked for the password for the Ansible Vault (awscred.yml file) :
#:> ansible-playbook setup_ec2.yml --ask-vault-pass
PLAY [all] ****************************************************************************************
TASK [Gathering Facts] ****************************************************************************
ok: [localhost]
TASK [Running EC2 Role] ****************************************************************************
TASK [ec2 : launch Master on AWS cloud]*************************************************************
changed: [localhost] => (item=Master01)
TASK [ec2 : launch Worker Node on AWS cloud] *******************************************************
changed: [localhost] => (item=Worker01)
changed: [localhost] => (item=Worker02)
PLAY RECAP *****************************************************************************************
localhost    : ok=3    changed=2    unreachable=0    failed=0    skipped=0    rescued=0    ignored=0
#:>
This Playbook will launch 3 EC2 Instances for Kubernetes Cluster one Master Node and two Worker Nodes. After a few minutes our instances are up running
Verify your instances has been properly created in AWS Management Console and test ssh connexion with your AWS key-pair :
Deployment of our kubernetes cluster
Initial setup
We need to get the public , private IP addresses and privte hostname of the nodes we just deployed. You can use this script Getinventory.sh which reads the variable file of the Role EC2 and displays the public and private ip addresses of each node:
%:> ./Getinventory.sh
Master01 Private Name: ip-10-2-0-99 - Private IP: 10.1.0.99 -  Public IP: 4.210.93.212
Worker01 Private Name: ip-10-2-0-235 - Private IP: 10.1.0.235 - Worker01 Public IP: 5.80.146.238
Worker02 Private Name: ip-10-2-1-59 - Private IP: 10.1.1.59 - Worker02 Public IP: 5.86.228.206
%:>
Or retrieve this information from the EC2 console or through ansible inventory scripts.
Configuration host file
We will create a host file in our workspace with the following entries (replace the different values of the variables with your own)
[kubernetes_master_nodes]
k8smaster01 ansible_host=4.210.93.212 ansible_ssh_user=ec2-user ansible_ssh_private_key_file=./ssh-keys/admin.pem

[kubernetes_worker_nodes]
k8sworker01 ansible_host=5.80.146.238 ansible_ssh_user=ec2-user ansible_ssh_private_key_file=./ssh-keys/admin.pem
k8sworker02 ansible_host=5.86.228.206 ansible_ssh_user=ec2-user ansible_ssh_private_key_file=./ssh-keys/admin.pem

[kubernetes:vars]
ansible_ssh_user=ec2-users
The value of the ansible_host variable is your public ip address.
Creation of playbooks
First steps create a playbooks directory :
#:>  mkdir -p playbooks
#:>
We will create 3 playbooks :
- set_k8s_node.yml : installs and configures the prerequisites for the master and workers nodes
- run_master_install.yml : install and configure the master node
- run_worker_install.yml : install and configure the worker nodes
We will create a file env_variables that contains the variables we need for the deployment. Edit file playbooks/env_variables and insert the following lines (replace the different values of the variables with your own):
# Private Hostname/IP Master Nodes
MASTERS:
 MASTER01:
  nodename: ip-10-2-0-99
  iplocalnode: 10.2.0.99

# Private Hostname/IP Worker Nodes
WORKERS:
 WORKER01:
  nodename: ip-10-2-0-235
  iplocalnode: 10.2.0.235
 WORKER02:
   nodename: ip-10-2-1-59
   iplocalnode: 10.2.1-59

# CLUSTER K8S Nodes
CLUSTER:
  NODE1:
   nodename: ip-10-2-0-99
   iplocalnode: 10.2.0.99
  NODE2:
   nodename: ip-10-2-0-235
   iplocalnode: 10.2.0.235
  NODE3:
   nodename: ip-10-2-1-59
   iplocalnode: 10.2.1-59

#Kernel parameters
KERNEL:
    parameter1:
       name: net.ipv4.ip_forward
       setvalue: 1
    parameter2:
          name: net.ipv4.conf.all.forwarding
          setvalue: 1
    parameter3:
           name: net.bridge.bridge-nf-call-iptables
           setvalue: 1


# Variable command to join k8s cluster
token_file: join_token
Replace the nodename entries with the value of the private name of each node and the iplocalnode entries with the value of the private ip address of each node.
Create or Edit file playbooks/set_k8s_node.yml and insert the following lines
- name: Disabling Swap on all nodes
   shell: swapoff -a

 - name: Commenting Swap entries in /etc/fstab
   replace:
    path: /etc/fstab
    regexp: '(^/.*swap*)'
    replace: '# \1'

 - name: Add IPs to /etc/hosts on masters and workers
   lineinfile:
    dest: /etc/hosts
    line: "{ { item.value.iplocalnode } } { { item.value.nodename } }"
    state: present
   with_dict: ""

 - name: Install YQ Tools and Set kernel modules
   shell: |
    sudo wget https://github.com/mikefarah/yq/releases/download/v4.2.0/yq_linux_amd64.tar.gz -O - | sudo tar xz && sudo mv yq_linux_amd64 /usr/bin/yq
    sudo modprobe overlay
    sudo modprobe br_netfilter

 - name: SET kernel Parameters
   lineinfile:
    dest: /etc/sysctl.conf
    line: "{ { item.value.name } }={ { item.value.setvalue } }"
    state: present
   with_dict: ""

 - name: Update kernel Parameters
   shell: sudo sysctl -p

 - name: Add Kubernetes repos
   community.general.zypper_repository:
     repo: 'https://download.opensuse.org/repositories/home:/dirkmueller:/Factory:/Staging/standard/home:dirkmueller:Factory:Staging.repo'
     state: present
     disable_gpg_check: yes

 - name: Install CRI-O package
   community.general.zypper:
    name: 'cri-o'
    state: present
    disable_recommends: no

 - name: Install CRI-TOOLS package
   community.general.zypper:
    name: 'cri-tools'
    state: present
    disable_recommends: no

 - name: Install PODMAN package
   community.general.zypper:
    name: 'podman'
    state: present
    disable_recommends: no

 - name: Remove the docker package
   community.general.zypper:
    name: docker
    state: absent

 - name: Start CRI-O
   ansible.builtin.systemd:
    state: started
    name: crio

 - name: Start kubelet
   ansible.builtin.systemd:
    name: kubelet
    state: started
    enabled: yes

 - name: Just force systemd to reread configs
   ansible.builtin.systemd:
    daemon_reload: yes

 - name: Add Kubectl repos
   community.general.zypper_repository:
    #name:  devel_CaaSP_Head_ControllerNode
    repo: 'https://download.opensuse.org/repositories/devel:CaaSP:Head:ControllerNode/openSUSE_Tumbleweed/devel:CaaSP:Head:ControllerNode.repo'
    state: present
    disable_gpg_check: yes

 - name: Install kubectl package
   community.general.zypper:
    name: 'kubectl'
    state: present
    disable_recommends: no
This playbook will be used in the run_master_install and run_woker_install playbooks to install the kubernetes prerequisites
Create or edit file playbooks/run_master_install.yml and insert the following lines : Modify the dest entry of the Get Join Cluster command with the path where your playbooks are stored
- hosts: kubernetes_master_nodes
  become: yes
  vars_files:
  - env_variables
  tasks:
  - include_tasks: set_k8s_node.yml

  - name: Run Master Configuration Setup kubernetes configuration
    shell: |
     sudo wget https://raw.githubusercontent.com/colussim/ansible-aws-k8s/main/k8sconf/setk8sconfig.yaml -O /tmp/setk8sconfig.yaml
     sudo /usr/bin/kubeadm init --config /tmp/setk8sconfig.yaml
    register: output

  - name: Run Master Configuration Copying required files
    shell: |
     mkdir -p $HOME/.kube
     mkdir -p /home/ec2-user/.kube
     sudo /bin/cp /etc/kubernetes/admin.conf $HOME/.kube/config
     sudo /bin/cp /etc/kubernetes/admin.conf /home/ec2-user/.kube/config
     sudo chown $(id -u):$(id -g) $HOME/.kube/config
     sudo chown -R ec2-user:users /home/ec2-user/.kube

  - name: Install Network Add-on
    shell: |
      version=$(/usr/bin/kubectl version | base64 | tr -d '\n')
      /usr/bin/kubectl apply -f https://cloud.weave.works/k8s/net?k8s-version=$version

  - name: Run Master Configuration install kubernetes Dashboard
    shell: |
     /usr/bin/kubectl apply -f https://raw.githubusercontent.com/kubernetes/dashboard/master/aio/deploy/recommended.yaml
     /usr/bin/kubectl apply -f https://raw.githubusercontent.com/colussim/ansible-aws-k8s/main/k8sconf/clusteradmin.yaml

  - name: Get Kubernetes config files
    ansible.builtin.fetch:
     src: /etc/kubernetes/admin.conf
     dest: config
     flat: yes

  - name: Get Join Cluster command
    ansible.builtin.fetch:
      src: /tmp/joincluster.sh
      dest: /Users/manu/Documents/App/Ansible/AWS-k8s/playbooks/join_token
      flat: yes

  - name: Show Cluster K8s
    shell: /usr/bin/kubectl get nodes
    register: Node

  - debug:
         var: Node.stdout_lines
Create or edit file playbooks/run_worker_install.yml and insert the following lines :
- hosts: kubernetes_worker_nodes
  become: yes
  vars_files:
  - env_variables
  tasks:
  - include_tasks: set_k8s_node.yml

  - name: Copying token to worker nodes
    copy: src={ { token_file } } dest=join_token

  - name: Joining worker nodes with kubernetes master
    shell: |
       mkdir -p $HOME/.kube
       mkdir -p /home/ec2-user/.kube
       chown -R ec2-user:user /home/ec2-user/.kube
       sh join_token

  - name: Copy k8s configuration file for user root
    ansible.builtin.copy:
     src: playbooks/config
     dest: $HOME/.kube/config
     owner: root
     group: root

  - name: Copy k8s configuration file for user ec2-user
     ansible.builtin.copy:
     src: playbooks/config
     dest: $HOME/.kube/config
     owner: ec2-user
     group: user

  - name: Set Worker role
     shell: usr/bin/kubectl label node $HOSTNAME node-role.kubernetes.io/worker=worker
     register: Node

  - name: Show Cluster K8s
    shell: /usr/bin/kubectl get nodes
    register: Node

  - debug:
         var: Node.stdout_lines
Now we will create two files for the execution of the playbooks :
Create or edit file setup_master.yml and insert the following lines :
---
- import_playbook: playbooks/run_master_install.yml
Create or edit file setup_worker.yml and insert the following lines :
---
- import_playbook: playbooks/run_worker_install.yml
Run master playbook install
%:> ansible-playbook setup_master.yml
PLAY [kubernetes_master_nodes] ***********************************************************************************************

TASK [Gathering Facts] *******************************************************************************************************
ok: [k8smaster01]

TASK [include_tasks] *********************************************************************************************************
included: /Users/manu/Documents/App/Ansible/AWS-k8s/playbooks/set_k8s_node.yml for k8smaster01

TASK [Disabling Swap on all nodes] *******************************************************************************************
changed: [k8smaster01]

TASK [Commenting Swap entries in /etc/fstab] *********************************************************************************
ok: [k8smaster01]

TASK [Add IPs to /etc/hosts on masters and workers] **************************************************************************
changed: [k8smaster01] => (item={'key': 'NODE1', 'value': {'nodename': 'ip-10-1-0-99', 'iplocalnode': '10.1.0.99'}})
changed: [k8smaster01] => (item={'key': 'NODE2', 'value': {'nodename': 'ip-10-1-0-235', 'iplocalnode': '10.1.0.235'}})
changed: [k8smaster01] => (item={'key': 'NODE3', 'value': {'nodename': 'ip-10-1-1-59', 'iplocalnode': '10.1.1-59'}})

TASK [Install YQ Tools and Set kernel modules] *******************************************************************************
changed: [k8smaster01]

TASK [SET kernel Parameters] *************************************************************************************************
changed: [k8smaster01] => (item={'key': 'parameter1', 'value': {'name': 'net.ipv4.ip_forward', 'setvalue': 1}})
changed: [k8smaster01] => (item={'key': 'parameter2', 'value': {'name': 'net.ipv4.conf.all.forwarding', 'setvalue': 1}})
changed: [k8smaster01] => (item={'key': 'parameter3', 'value': {'name': 'net.bridge.bridge-nf-call-iptables', 'setvalue': 1}})

TASK [Update kernel Parameters] ***********************************************************************************************
changed: [k8smaster01]

TASK [Add Kubernetes repos] ****************************************************************************************************
changed: [k8smaster01]

TASK [Install CRI-O package] ***************************************************************************************************

TASK [Install CRI-TOOLS package] ***********************************************************************************************
ok: [k8smaster01]

TASK [Install PODMAN package] **************************************************************************************************
ok: [k8smaster01]

TASK [Remove the docker package] ***********************************************************************************************
ok: [k8smaster01]

TASK [Start CRI-O] *************************************************************************************************************

TASK [Start kubelet] ***********************************************************************************************************
changed: [k8smaster01]

TASK [Just force systemd to reread configs] *************************************************************************************
ok: [k8smaster01]

TASK [Add Kubectl repos] *********************************************************************************************************
changed: [k8smaster01]

TASK [Install kubectl package] ***************************************************************************************************
changed: [k8smaster01]

TASK [Run Master Configuration Setup kubernetes configuration] *******************************************************************
changed: [k8smaster01]

TASK [Run Master Configuration Copying required files] ***************************************************************************
changed: [k8smaster01]

TASK [Install Network Add-on] *****************************************************************************************************
changed: [k8smaster01]

TASK [Run Master Configuration install kubernetes Dashboard] **********************************************************************
changed: [k8smaster01]

TASK [Get Kubernetes config files] *************************************************************************************************

TASK [Show Cluster K8s] ************************************************************************************************************

TASK [debug] ************************************************************************************************************************
ok: [k8smaster01] => {
    "Node.stdout_lines": [
        "NAME           STATUS   ROLES                  AGE   VERSION",
        "ip-10-1-0-99   Ready    control-plane,master   20s   v1.22.1"
    ]
}

PLAY RECAP **************************************************************************************************************************
k8smaster01  : ok=25   changed=17   unreachable=0    failed=0    skipped=0    rescued=0    ignored=0
Run workers playbook install
%:> ansible-playbook setup_workers.yml

PLAY [kubernetes_master_nodes] ******************************************************************************************************
TASK [Gathering Facts] **************************************************************************************************************
ok: [k8smaster01]

TASK [Get command to join Cluster] ***************************************************************************************************
changed: [k8smaster01]

TASK [Storing Logs and Generated token for future purpose.] ***************************************************************************
changed: [k8smaster01 -> localhost]

PLAY [kubernetes_worker_nodes] *********************************************************************************************************

TASK [Gathering Facts] *****************************************************************************************************************
ok: [k8sworker01]
ok: [k8sworker02]

TASK [Disabling Swap on Workers] *******************************************************************************************************
changed: [k8sworker02]
changed: [k8sworker01]

TASK [Commenting Swap entries in /etc/fstab] *******************************************************************************************
ok: [k8sworker01]
ok: [k8sworker02]

TASK [Add IPs to /etc/hosts on Workers] ************************************************************************************************
changed: [k8sworker01] => (item=k8sworker01)
changed: [k8sworker02] => (item=k8sworker01)
changed: [k8sworker01] => (item=k8sworker02)
changed: [k8sworker02] => (item=k8sworker02)
changed: [k8sworker01] => (item=k8smaster01)
changed: [k8sworker02] => (item=k8smaster01)

TASK [Run Workers Configuration set kernel and repositories] ****************************************************************************
changed: [k8sworker01]
changed: [k8sworker02]

TASK [Run Workers Configuration install packages] ***************************************************************************************
changed: [k8sworker01]
changed: [k8sworker02]

TASK [Copying token to worker nodes] *****************************************************************************************************
changed: [k8sworker01]
changed: [k8sworker02]

TASK [Joining worker nodes with kubernetes master] ***************************************************************************************
changed: [k8sworker01]
changed: [k8sworker02]

PLAY [kubernetes_master_nodes] ***********************************************************************************************************

TASK [Gathering Facts] *******************************************************************************************************************
ok: [k8smaster01]

TASK [Set Worker node Role] ***************************************************************************************************************
changed: [k8smaster01]

TASK [debug] ******************************************************************************************************************************
ok: [k8smaster01] => {
    "Role.stdout_lines": [
        "node/ip-10-1-0-235 labeled",
        "node/ip-10-1-1-59 labeled",
        "NAME            STATUS     ROLES                  AGE   VERSION",
        "ip-10-1-0-235   Ready      worker                 10s   v1.22.1",
        "ip-10-1-0-99    Ready      control-plane,master   22m   v1.22.1",
        "ip-10-1-1-59    NotReady   worker                 10s   v1.22.1"
    ]
}

PLAY RECAP ********************************************************************************************************************************
k8smaster01                : ok=6    changed=3    unreachable=0    failed=0    skipped=0    rescued=0    ignored=0
k8sworker01                : ok=8    changed=6    unreachable=0    failed=0    skipped=0    rescued=0    ignored=0
k8sworker02                : ok=8    changed=6    unreachable=0    failed=0    skipped=0    rescued=0    ignored=0
After a few minutes your kubernetes cluster is up and running 😀 👏
Remote control
Check if your cluster works:
Your kubernetes cluster bind on local ip addresses you can create an AWS Site-to-Site connection AWS Site-to-Site to be able to eat the cluster from your workstation or more simply connect with ssh on the master node.We will use the ssh method. (replace the ip address with the public ip of your master node)
%:> ssh  -o StrictHostKeyChecking=no -o UserKnownHostsFile=/dev/null -i ssh-keys/admin.pem ec2-user@4.210.93.212 kubectl get nodes
NAME            STATUS   ROLES                  AGE     VERSION
ip-10-1-0-235   Ready    worker                 5m      v1.22.1
ip-10-1-0-99    Ready    control-plane,master   20m     v1.22.1
ip-10-1-1-59    Ready    worker                 5m      v1.22.1
%:>
To access the dashboard you’ll need to find its cluster IP :
%:> ssh  -o StrictHostKeyChecking=no -o UserKnownHostsFile=/dev/null -i ssh-keys/admin.pem ec2-user@4.210.93.212
$ kubectl -n kubernetes-dashboard get svc --selector=k8s-app=kubernetes-dashboard

NAME                   TYPE        CLUSTER-IP      EXTERNAL-IP   PORT(S)   AGE
kubernetes-dashboard   ClusterIP   10.108.143.81   <none>        443/TCP   26m
$
Get token for the connection to the dashboard :
$ kubectl -n kube-system describe secret $(kubectl -n kube-system get secret | awk '/^deployment-controller-token-/{print $1}') | awk '$1=="token:"{print $2}'
eyJhbGciOiJSUzI1NiIsImtpZCI6Ijd1MlVaQUlJMmdTTERWOENacm9TM0pTQ0FicXoyaDhGbnF5R1
7aM-uyljuv9ahDPkLJKJ0cnen1YDcsswwdIYL3mnW3b1E07zOR99w2d_PM_4jlFXnFt4TvIQ7YY57L
2DDo60vlD1w3lI0z_ogT8sj5Kk1srPE3L6TuIOqWfDSaMNe65gK0j5OJiTO7oEBG5JUgXbwGb8zOK
iPPQNvwrBu6updtqpI1tnU1A4lKzV70GS7pcoqqHMl26D1l0C4-IbZdd1oFJz3XnbTNy70WEMiVp
2O8F1EKCYYpQ
$
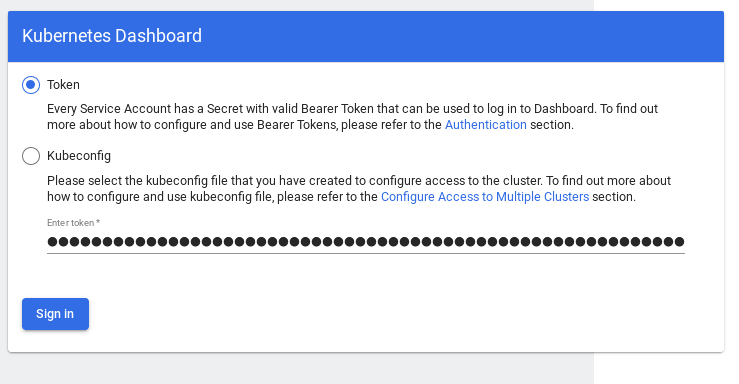
copy and paste the token value in the dashboard connection window (in next step)
Open a SSH tunnel:
$ ssh -L 8888:10.96.51.199:443 -o StrictHostKeyChecking=no -o UserKnownHostsFile=/dev/null -i ssh-keys/id_rsa_aws ec2-user@4.210.93.212Now you can access the dashboard on your computer at http://localhost:8888. Paste the token value :


Conclusion
With kubeadm and Ansible, booting a Kubernetes cluster can be done with a some commands and it only takes few minutes to get a fully functional configuration. You now have a basic understanding of how to use Ansible. You’ll notice that the Ansible code remains easy to read and simplifies the exact description of the infrastructure you want to create.
Resources :
 Ansible Amazon Web Services Guide
 Necessary files for this tutorial

 Ansible Documentation