Using GitHub webhook
GitHub is arguably the largest remote code hosting service in the world. It is also arguably the most used platform for developers around the world to work on personal and team code projects. One of the attributes that contribute to the widespread adoption of GitHub is the ability to integrate the platform into development workflows, OAuth applications, CI/CD processes and many other use cases.
In this article, we examine one of the mechanisms for integrating GitHub into workflows with an example. The name of this mechanism is: GitHub webhooks.
What are Webhooks ?
Webhooks are the ways of communicating between two apps by sending notifications or alerts when something happens. Webhooks are automated messages sent from apps during any event. They have a payload or message, which is sent to a unique URL.
When an event happens on the trigger application, it serializes the data about that event and sends it to a Webhook URL from the action application. This is defined as the one you want to do something based on the data collated from the first application.
In GitHub : Webhooks can be installed on an organization, a specific repository, or a GitHub App. Once installed, the webhook will be sent each time one or more subscribed events occurs.
Use case
We need to track events at the repository level of our GitHub Organization. These events are :
- created, deleted, archived, unarchived, publicized, privatized, edited, renamed, or transferred repositories
- Git push to a repository
we would like to receive a message in our Slack administration channel and be able to record the event in a database.
And when creating a new repository propose a default README.md if it is not created and set a protection of the principale branch of our repository.
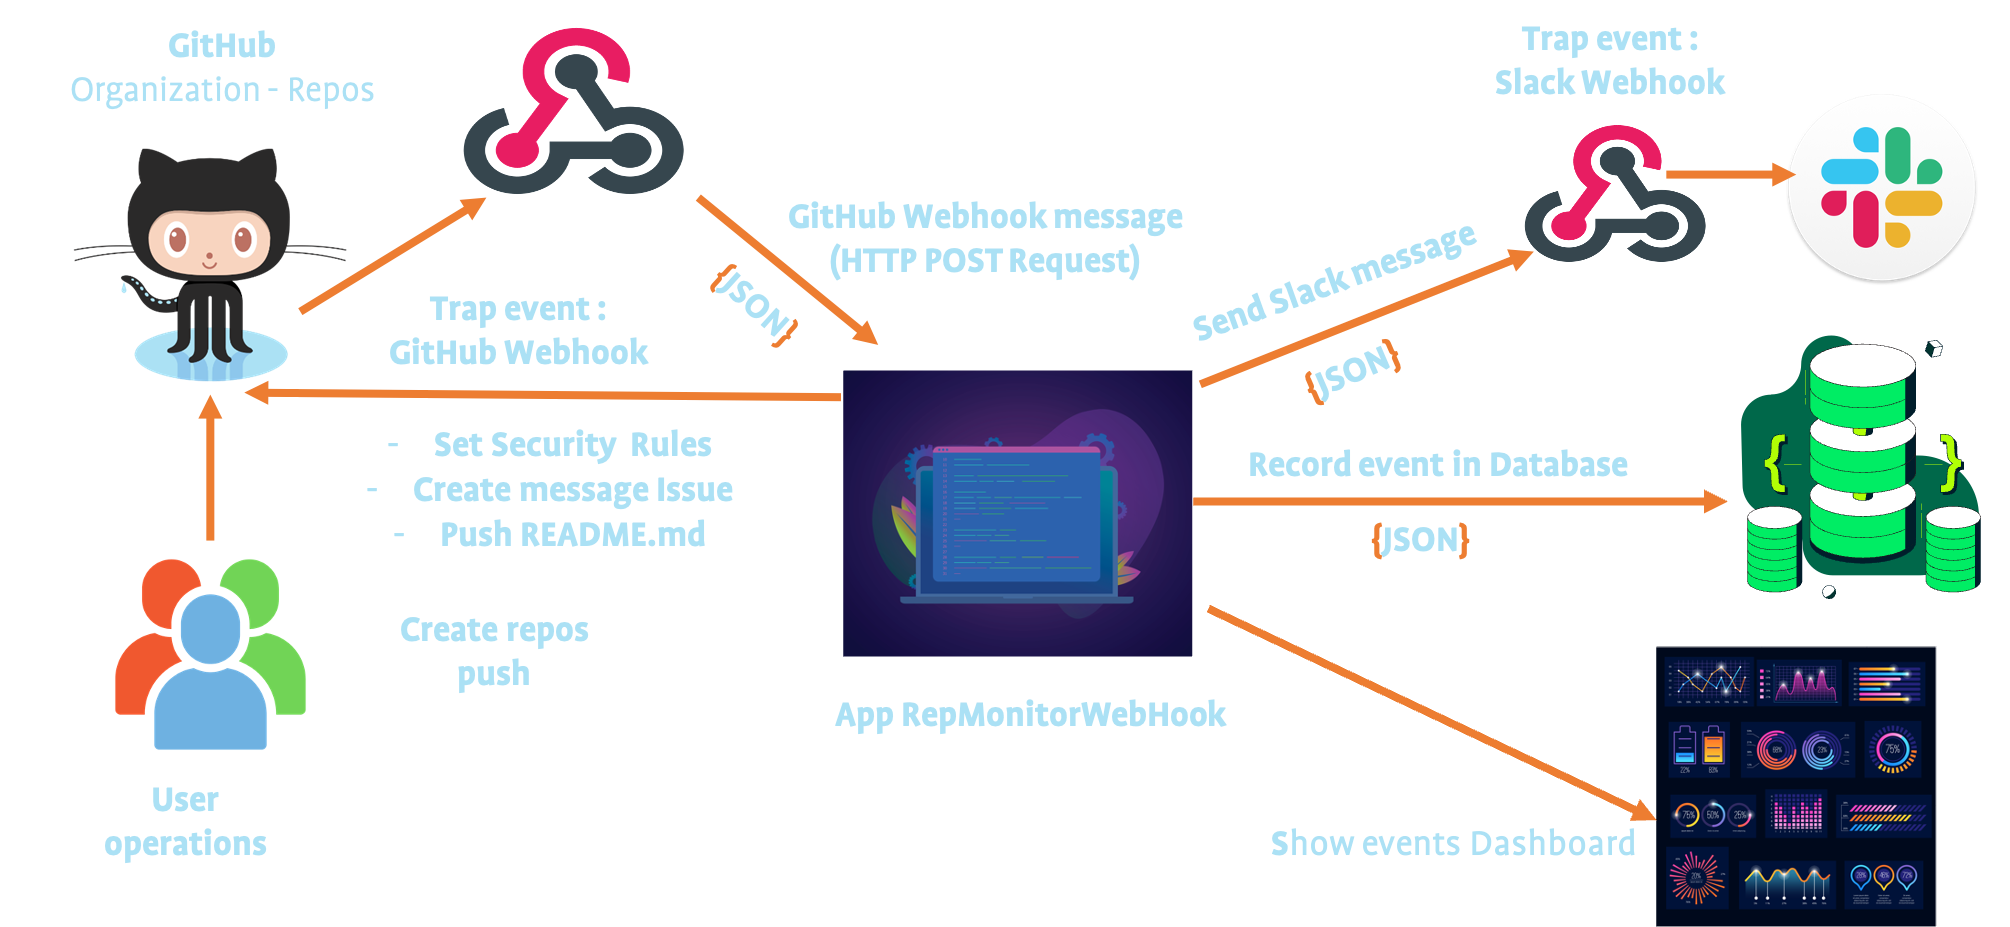
Our architecture could be as follows:
Prerequisites
Before you get started, you’ll need to have these things:
- A GitHub account
- A GitHub token
- An organization (but not mandatory you can use the webhooks on a repository)
- A Slack account
- Download Slack, It is available on several platforms
- A mongoDB instance
- The MongoDB Shell
- Go language installed
- Linux or Mac OSX instance
You can ask yourself why use mongoDB ? it’s jiste an example, currently using mongoDB for a customer project I continue …Moreover we can load our message which is in json format directly into mongoDB.
In a next step I will register the events in an influxDB database.
Initial setup
I have create a demo application that monitors events (push and repository) on an organization or a repository.
Clone the repository and install the dependencies:
$git clone https://github.com/colussim/RepMonitorWebHook.git RepMonitorWebHook
$
For the dependencies setup, please follow the README of the GitHub repository
Create a Slack channel
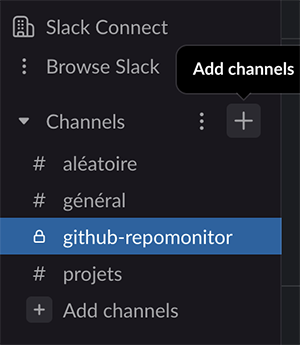
We will create our Slack channel:
Run Slack client :
 .
.
In this example we create a channel : github-repomonitor
We will create our Slack application :
Create a Slack application
Log in at the following URL with your Slack account: https://api.slack.com/apps
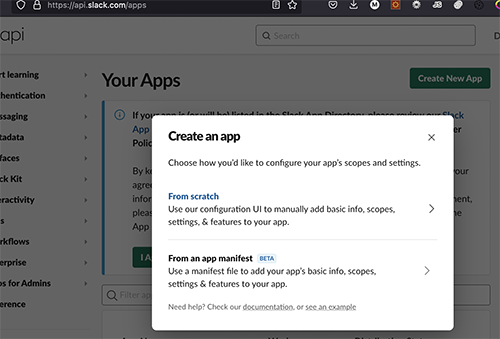
- Click on button : Create New App
- Choose the option : From scratch
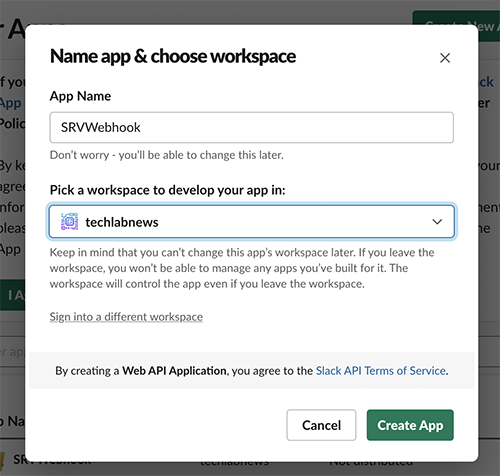
- Insert your application name
- Choose your workspace
- Click on button : Create App

Activate Slack Webhooks
-
Click the name of your application

-
Choose option Incoming Webhooks and setup to on
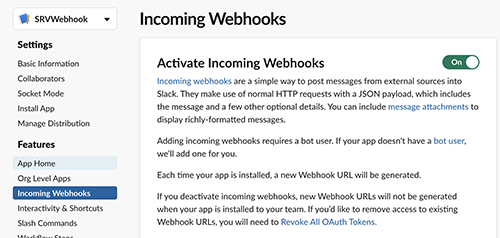
-
click on Add New Webhook to Workspace
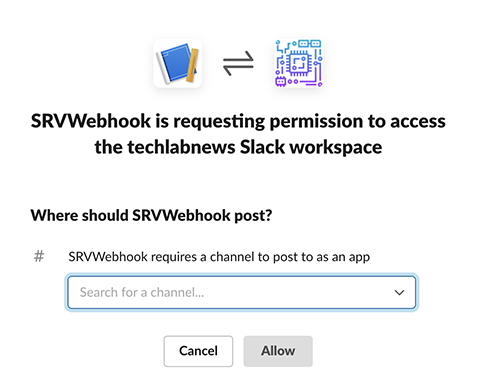
-
Choose your channel
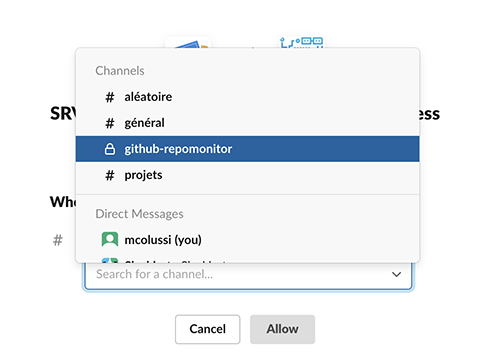
-
Click on button : Allow
- Now your URL slack webhook is created , copy this url and past in RepMonitorWebHook config file (next step)

Setup RepMonitorWebHook
You will find 2 configuration files in the directory code_app/config :
config.json : configuration file with the following parameters:
{
    "WebhookSecretKey":"password GitHub webhook",
    "WebhookSlackUrl" : "Slack webhook EndPoint",
    "FooterSlack" : "title footer slack message",
    "AvatarURLorg":"Avatar image for GitHub Organization",
    "PortUrl":"Port for http EndPoint",
    "GitToken":"token github",
    "Adminemail":"e-mail organization contact",
    "Issueass": "Logins for Users to assign to this issue"

  }
configdb.json : configuration for access mongoDB database
{
  "Urlconnect":"mongoDB url to connect",
	"DB":         "name od database",
	"Issues": "location"
  }
The default settings are as follows:
{
  "Urlconnect":"mongodb://repmonitor:Demos2022@localhost:27017/?authMechanism=SCRAM-SHA-256&authSource=repmonitor",
	"DB":         "repmonitor",
	"Issues": "loggithub"
  }
The default README.md file that is pushed when a repository is created (if it is not created) is located in the directory: code_app/config
mongoDB database creation scripts without the directory : databases File : createdatabase.txt This script create database repmonitor , location : loggithub and the user repmonitor with the password : Demos2022
use repmonitor
db.createCollection("loggithub")
db.createUser( { user: "repmonitor",pwd: "Demos2022", roles: [ { role: "readWrite", db: "repmonitor" }, { role: "read", db: "reporting" } ] } ) Run database creation script :
#:> mongosh -u admin_user -p admin_password --authenticationDatabase admin < createdatabase.txtCreating GitHub Webhooks
In this example we will create a webhook on our organization: techlabnews that tracks events linked to the repository and the push.
- Log in to your GitHub account and go to your desired repository. If you wish to create GitHub Webhook for your organization, then log in to your organization’s GitHub account.
- Then click on Settings that is present on the right side of the GitHub bar. Next, click on the Webhooks option as shown below. Click on Add Webhook.
- Now on the next page you will see some of the options that you need to fill in as shown below.
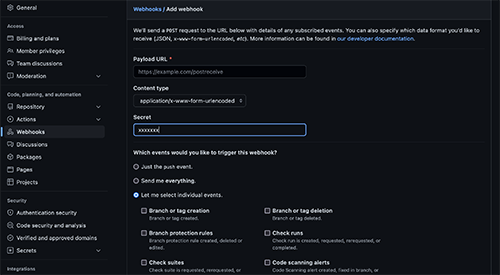
- Payload URL: The payload URL is the server’s URL where the Webhook POST requests will be received : [http://server:3002/webhook]
-
Content-Type: Different content formats can be used to deliver webhooks, as listed below:
- application/json: The JSON payload will be delivered as the body of the POST request. Select this option
- application/x-www-form-urlencoded: The JSON payload will be sent as a form parameter named payload.
- Secret: Setting a Webhook Secret ensures that only GitHub POST requests are routed to the payload URL. When you set a Secret, the Webhook POST request will include the X-Hub-Signature and X-Hub-Signature-256 headers.
- SSL Verification: You will have the ability to configure the SSL verification settings if your “Payload URL” is a secure site (HTTPS). GitHub will not show this option if your “Payload URL” is not secure (HTTP). When providing Webhook payloads, GitHub checks your website’s SSL certificate by default. SSL verification ensures that hook payloads reach your URL endpoint in a secure manner.Do not select this option for our configuration
- Active: Webhook deliveries are set to “Active” by default. By deselecting “Active,” you can turn off the distribution of Webhook payloads.
- Events: Webhooks are built around events. These Webhooks are triggered whenever a specific action on the repository is performed, which your server’s payload URL intercepts and responds to.
- select the option “Let me select individual events”. Now you can choose your events : Pushes and Repositories
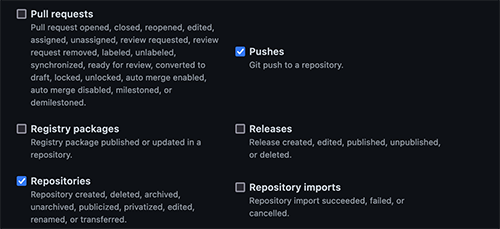
- After choosing the events, click on the Add Webhook button.
You can also create a weebhook via the GitHub API. With this method you must first have generated a token. In your GitHub account, go to the Settings/Developer settings/Personal Access Token Settings
You can now build a new Webhook using cURL in any Organization or Repository to which you have access y entering the following commands :
curl -X POST \
  https://api.github.com/orgs/<ORGANIZATION_NAME>/hooks \
  -H 'authorization: token <YOUR_API_TOKEN>' \
  -H 'cache-control: no-cache' \
  -d '{
  "config": {
    "url": "http://server:3002/webhook"
  },
  "events": [
    "repositories",
    "push"
  ]
}'
Run RepMonitorWebHook
#:> go run SRVWebhook.go
2022/04/25 18:15:54 ⇨ http server started EndPoint on [::]: 3002
Now your events on your Organization can be tracked.
If you don’t have a enterprise GitHub account,create your repositories in public mode otherwise you won’t have access to some features like creating security rules.
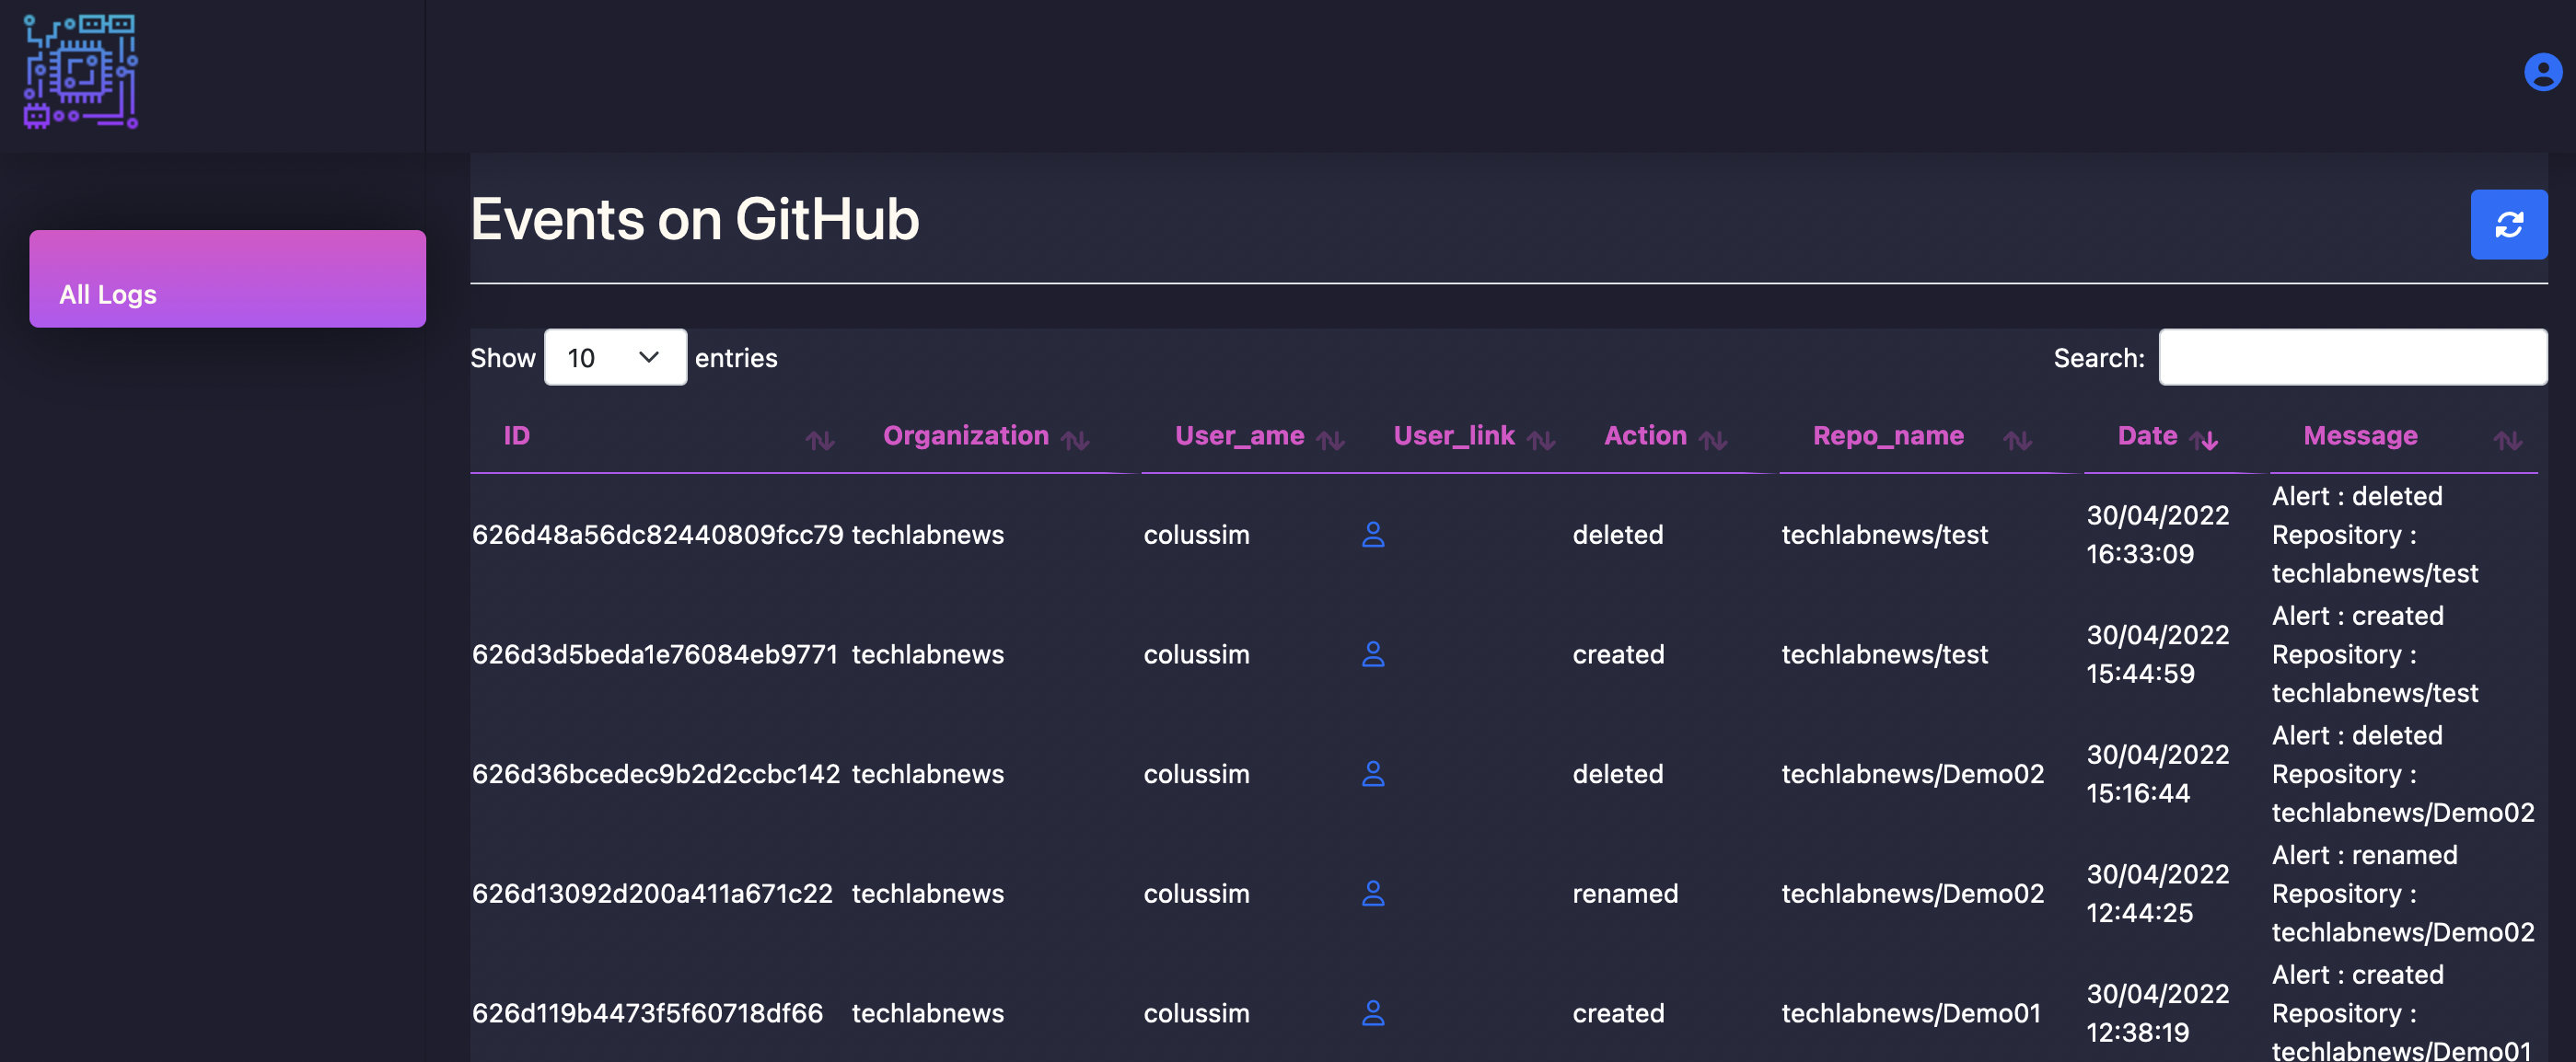
As soon as there is an event in your Organization on the repositories (created, deleted, archived, unarchived, publicized, privatized, edited, renamed, or transferred) an push , you receive a message in the Slack channel: github-repomonitor and you can see the events in web gui.
Slack message

web interface : http://host:3002/event
mongoDB database

Conclusion
GitHub makes practically every event in their system public. That’s one of the things that makes Gitub so great 😀. You tell it what events and URLs you want to know about, and GitHub sends a POST request with that data whenever the event occurs. With GitHub’s Webhook, you can know the pulse, patterns, metrics, progress, and trends of your organization’s team so you can spot opportunities to improve the daily workflow.
Resources :
Creating a personal access token
Documentation MongoDB Go Driver
