I built a bare-metal KUBERNETES CLUSTER on Raspberry Pi.
After building complex kubernetes cluster architectures for several customers, it’s been a while since I planned to build a cluster for myself as a hobby project, for fun and to host projects. And it’s done 😀
Hobbies should be fun … but requires some concession with our wives … 😀
In this post I’ll be walking you step by step on how I built a bare-metal, 4-node Kubernetes cluster running on Raspberry Pis.
You can add more nodes if you like. I chose 4 nodes simply because I had these Raspberry units in stock. This is just my hobby project.
Without further ado, let’s start with the article you came to read.
Hardware configuration
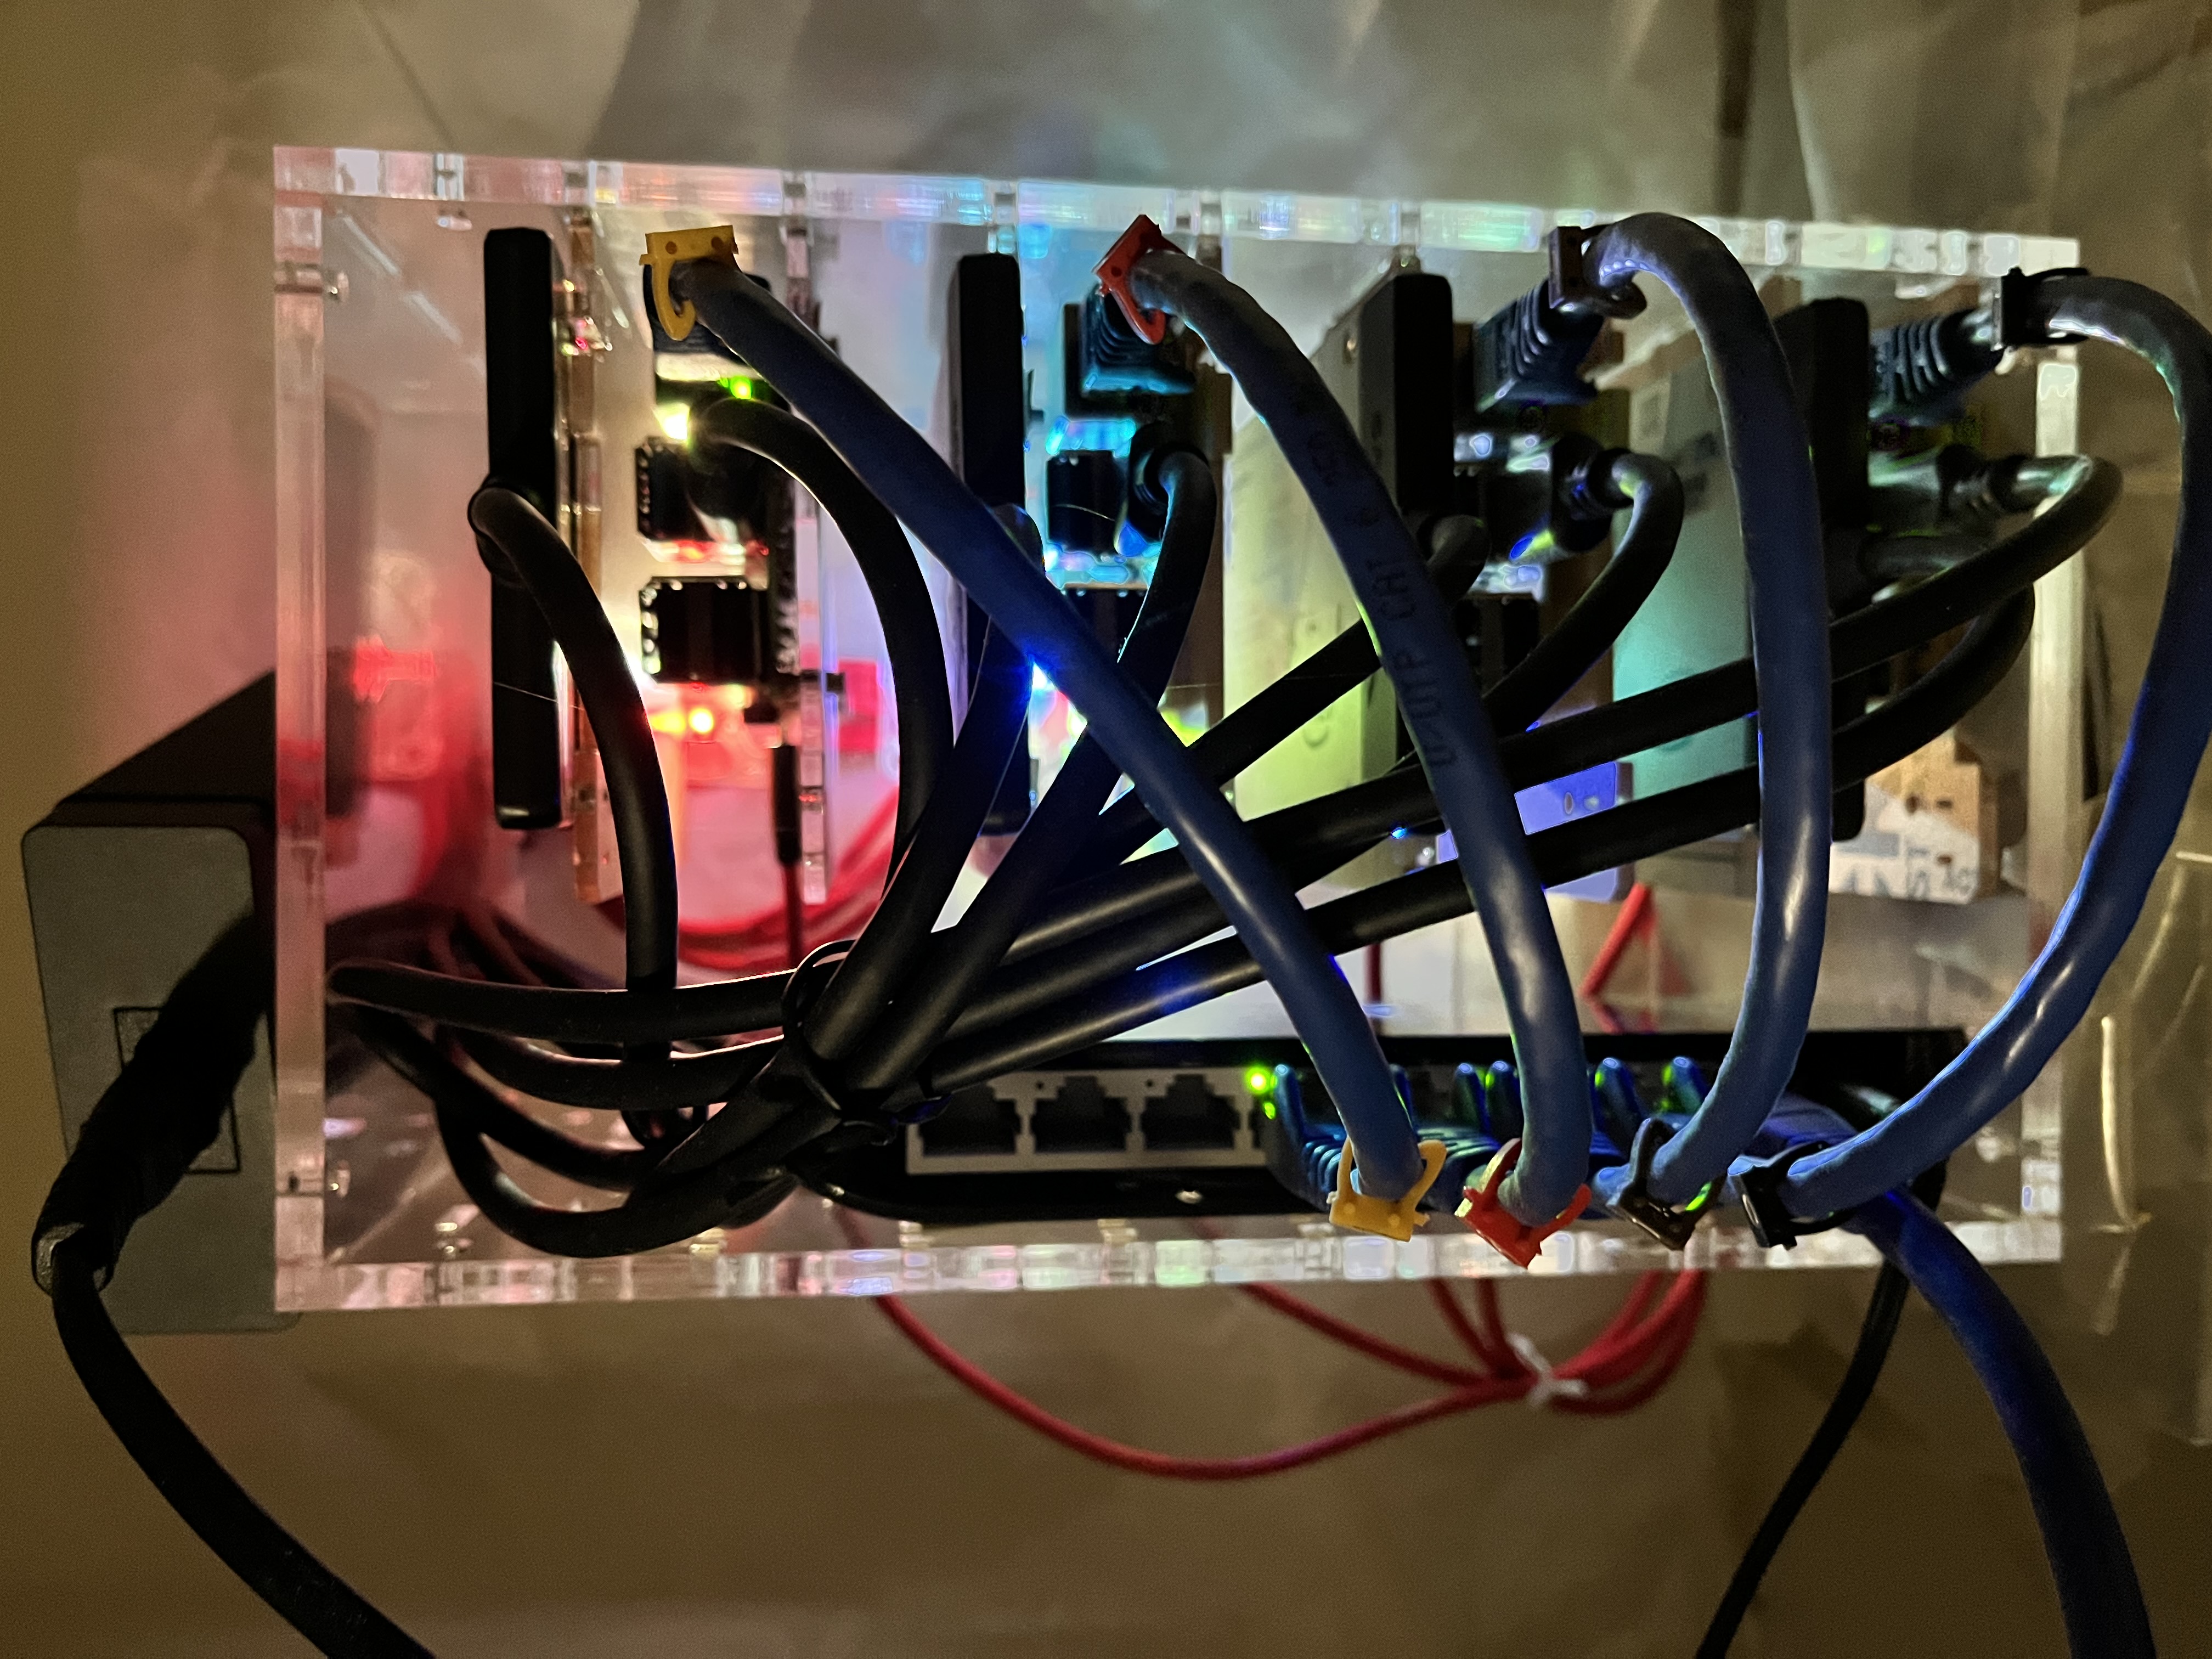
This is the part that gives the impression that I’m trying to convince you to build it as well . As now a Raspberry is becoming a rare commodity, but I had these Raspberry units in stock before this shortage …
The configuration I used is the following :
COMPUTE
There are different versions of Raspberry Pi, I had in stock 4 Raspberry PI 4B, my configuration is the following :
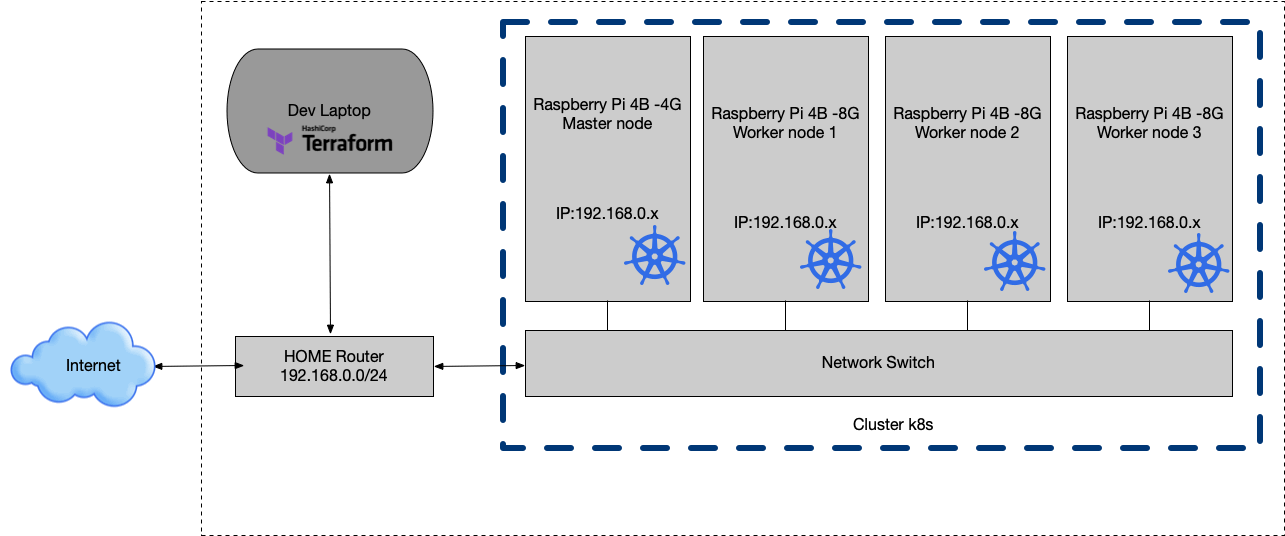
- 1 x Raspberry Pi 4B (4 CPU, 4 GB RAM each) for master node
- 3 x Raspberry Pi 4B (4 CPU, 8 GB RAM each) for worker node
That’s 12 CPUs, 24 GB memory in total - plenty of room for running multiple projects.
STORAGE
Raspberry Pis don’t come with on-board storage space. They do come with microSD slots, though, so microSD cards can be used to hold the OS and data for the Pi.I opted for SDXC SanDisk Extreme PRO 256GB memory cards. To have a distributed storage (like OpenEBS or other) I added 4 SSD disks which will be connected on the USB port, not very powerful 😀 ! but it is tests and we don’t have yet a direct PCIE bus on the Raspberry available easily.To connect them I used 4 x USB 3.0 adapters for SSDs and 2.5” SATA I/II/III hard drives (EC-SSHD).
POWER
For the power supply I took the choice to power each Raspberry via a traditional DC power supply (micro-USB).I used a 6 port desktop USB charger with PowerIQ technology : Anker PowerPort 60 W 6-Port and 4 x USB to micro-USB cables. To limit the cabling, we could have started with a Power over Ethernet (PoE) solution but we would have had to invest more on the switch.
COOLING
For the cooling I opted for a fan with adjustable speed and silent : 2 x GeekPi 2PCS Raspberry Pi.
NETWORK
For the network I used a switch TP-Link 8 ports TL-SG1008D and Ethernet cable set of 10 cables.
OS
For the OS I used the openSUSE MicroOS Kubic Distribution that is Certified Kubernetes ,which integrates the bundle for kubernetes 1.23.4 and and uses cri-o. Small drawback how it is a bubble version if you want to add packages you will have to use the following command: transactional-update pkg install -y package
And then reboot
BOX
I bought a special carrying case from C4Labs for my Pi cluster.
Cost and Overall Specs
For your reference, here is the list of parts needed and their approximate price. It is true that this is an expensive hobby…. The reference prices below do not include shipping costs and import taxes, which depend on your location.
| Item | Price in € |
|---|---|
| 3xRaspberry Pi 4B 8GB | 255 € |
| 1xRaspberry Pi 4B 4GB | 64 € |
| 4xSanDisk Micro SD card 256 GB | 128 € |
| 4xSSD disks 256 GB | 136 € |
| 4xSabrent USB 3.0 adapter for SSDs and 2.5” SATA I/II/III hard drives | 30 € |
| 1xTP-Link TL-SG1008D Switch Ethernet Gigabit 8 ports | 19 € |
| 4xRJ45 CAT6 Network Cable - 0,25 cm | 20 € |
| 1xAnker USB PowerPort 6 Port 60W | 26 € |
| 4xMYLB cable usb c to USB2, 50cm short Câble USB C | 25 € |
| 2xGeeekPi 2PCS Raspberry Pi Adjustable Speed Fan | 24 € |
| 1xcarrying case from C4Labs | 75 € |
| Total | 802 € |
You can reduce the cost by taking only Raspberry Pi 4B 4GB, 3 nodes instead of 4 ,do not add external storage (SSD) and take a cheaper box.
Network topology
My cluster is located in the same Home private network.
Install O/S
Install openSUSE MicroOS KUBIC Download onto an SD card and boot.
Before launching the boot on the SD Card you must configure the first boot to make your system accessible after boot.
The disk images are pre-built, you have to provide a configuration file at first boot. At least a password for root is required. You can set different configuration parameters.
You will need :
- USB flash drive formated with any file system supported by MicroOS (e.g. FAT, EXT4, …)
- The volume label needs to be ignition
- On this media, you create a directory ignition containing a file with the name config.ign
- The resulting directory structure needs to look like this :
<root directory>
└── ignition
    └── config.ign
Example config.ign:
{
  "ignition": { "version": "3.1.0" },
  "passwd": {
    "users": [
      {
        "name": "root",
        "passwordHash": "pemFK1OejzrTI"
      }
    ]
  }
}
Create the value for the key passwordHash by using the command line
# openssl passwdSee the following link for more details on the procedure : MicroOS/Ignition.
You can customize your configuration, set hostname, ip address, start a particular service ….. I manually configured the hostname,ip address and default Gateway after each installation. For more information on the options see this link : https://coreos.github.io/ignition/
Now you can insert your flash drive and launch the boot on the SD card on the first node. Repeat this procedure on the 3 other nodes.
After a few minutes the 4 nodes are up 😀. On each node for the root user I create a .ssh/authorized_keys file where I insert my public key.
SETUP
on each node I will create an ssh config :
- Create an ssh rsa key : ssh-keygen -t rsa
- Create a authorized_keys file
- Add the public keys of each host and of your workstation in the authorized_keys file
- Distribute the authorized_keys file on each node
You will need to install Terraform on your workstation
I will use a Terraform workflow to configure my Kubernetes cluster.
Clone the repository and install the dependencies:
$:> git clone https://github.com/colussim/terraform-kubic.git
$:> cd terraform-kubic
Setup variables in the variables.tf file :
variable "master" {
  default = "master01"
  description = "Hostname master node"
}

variable "nodes" {
  default = 3
  description = "Number of Worker"
}

variable "worker" {
    type = list
    default = ["worker01", "worker02","worker03"]
    description = "Hostname for worker node"
}

variable "clustername" {
  default = "k8s-techlabnews"
  description = "K8S Cluster name"
}
variable "user" {
  default = "root"
  description = "User name to connect hosts"
}

variable "private_key" {
  type        = string
  default     = "ssh-keys/id_rsa"
  description = "The path to your private key on your Workstation"
}
Use terraform init command in terminal to initialize terraform and download the configuration files.
$ terraform-kubic :> terraform init
$ terraform-kubic :>
Use terraform apply command in terminal to create Kubernetes cluster with one master and three nodes:
$ terraform-kubic :> terraform apply
$ terraform-kubic :>Terraform used the selected providers to generate the following execution plan. Resource actions are indicated with the following symbols:
.........
.........
Do you want to perform these actions?
  Terraform will perform the actions described above.
  Only 'yes' will be accepted to approve.

  Enter a value: yes
  null_resource.k8s_master: Creating...
null_resource.k8s_master: Provisioning with 'file'...
null_resource.k8s_master: Provisioning with 'remote-exec'...
null_resource.k8s_master (remote-exec): Connecting to remote host via SSH...
null_resource.k8s_master (remote-exec):   Host: master01
null_resource.k8s_master (remote-exec):   User: root
null_resource.k8s_master (remote-exec):   Password: false
null_resource.k8s_master (remote-exec):   Private key: true
null_resource.k8s_master (remote-exec):   Certificate: false
null_resource.k8s_master (remote-exec):   SSH Agent: false
null_resource.k8s_master (remote-exec):   Checking Host Key: false
null_resource.k8s_master (remote-exec):   Target Platform: unix
null_resource.k8s_master (remote-exec): Connected!
........
........
null_resource.k8s_master: Creation complete after 1m12s [id=2622861027801445367]
null_resource.k8s_worker["worker01"]: Creating...
null_resource.k8s_worker["worker02"]: Creating...
null_resource.k8s_worker["worker03"]: Creating...
null_resource.k8s_worker["worker02"]: Provisioning with 'file'...
null_resource.k8s_worker["worker01"]: Provisioning with 'file'...
null_resource.k8s_worker["worker03"]: Provisioning with 'file'...
null_resource.k8s_worker["worker02"]: Provisioning with 'remote-exec'...
........
........
null_resource.k8s_worker["worker01"]: Creation complete after 0m54s [id=2622861027801445368]
null_resource.k8s_worker["worker02"]: Creation complete after 0m52s [id=2622861027801445369]
null_resource.k8s_worker["worker03"]: Creation complete after 0m53s [id=2622861027801445370]
NAME       STATUS   ROLES                  AGE   VERSION
master01   Ready    control-plane,master   3m   v1.23.4
worker01   Ready    worker                 1m   v1.23.4
worker02   Ready    worker                 1m   v1.23.4
worker03   Ready    worker                 1m   v1.23.4
After a few minutes your kubernetes cluster is up 😀
You can tear down the whole Terraform plan with :
$ terraform-kubic :> terraform destroy -forceResources can be destroyed using the terraform destroy command, which is similar to terraform apply but it behaves as if all of the resources have been removed from the configuration.
Remote control
You can also install the kubectl command on your workstation, there are different binary depending on your operating system
Create a $HOME/.kube directory and copy the config file from the master node to the /root/.kube directory
Check if your cluster works:
$:> kubectl get nodes -o custom-columns='NAME:metadata.name,STATUS:status.conditions[4].type,\
VERSION:status.nodeInfo.kubeletVersion,CONTAINER-RUNTIME:status.nodeInfo.containerRuntimeVersion'
NAME       STATUS   VERSION   CONTAINER-RUNTIME
master01   Ready    v1.23.4   cri-o://1.23.2
worker01   Ready    v1.23.4   cri-o://1.23.2
worker02   Ready    v1.23.4   cri-o://1.23.2
worker03   Ready    v1.23.4   cri-o://1.23.2
We can see that we use CRI-O instead of docker.
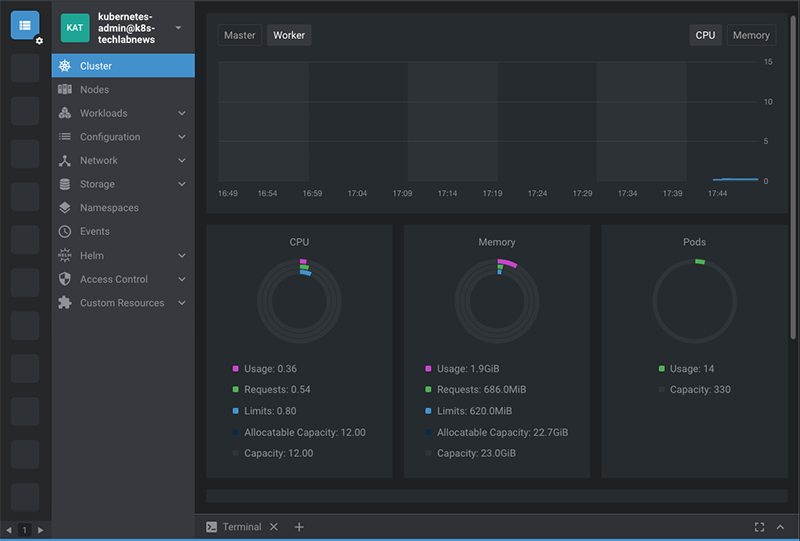
You can also use a tool that I like very much Lens from the company Mirantis. Lens, which bills itself as the Kubernetes IDE, is a useful, attractive, open source user interface (UI) for working with Kubernetes clusters. Out of the box, Lens can connect to Kubernetes clusters using your kubeconfig file and will display information about the cluster and the objects it contains. Lens can also connect to or install a Prometheus stack and use it to provide metrics about the cluster, including node information and health.
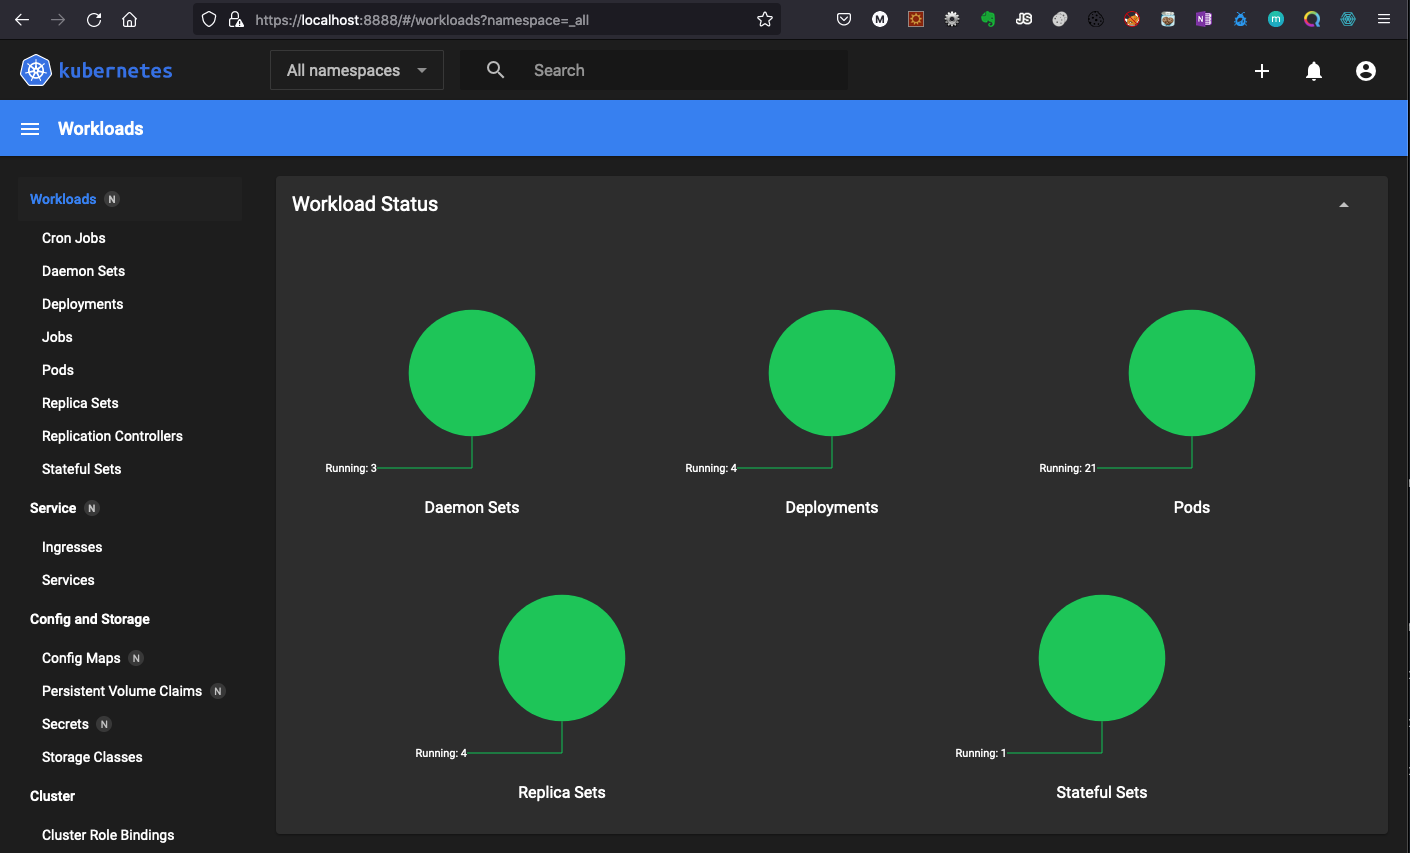
To access the kubernetes dashboard :
We will now connect to the kubernetes dashbord using the ssh port forwarding method.
In a future post we will expose the Kubernetes dashboard using the traefik input controller to avoid using the kubectl proxy option or an ssh port forwarding and allow access to the dashboard via HTTPS with proper TLS/Cert.
To access the dashboard you’ll need to find its cluster IP :
$:>kubectl -n kubernetes-dashboard get svc --selector=k8s-app=kubernetes-dashboard

NAME                   TYPE        CLUSTER-IP      EXTERNAL-IP   PORT(S)   AGE
kubernetes-dashboard   ClusterIP   10.109.94.227   <none>        443/TCP   12m
Get token for the connection to the dashboard :
$:> kubectl -n kube-system describe secret $(kubectl -n kube-system get secret | awk '/^deployment-controller-token-/{print $1}') | awk '$1=="token:"{print $2}'
eyJhbGciOiJSUzI1NiIsImtpZCI6ImNJTEJRTGphdUZkX2toUWFiM25jZi14LThibmlyOWR5YmdEMDlTNVRIQWMifQ.eyJpc3MiOiJrdWJlcm5ldGVzL3NlcnZpY2VhY2NvdW50Iiwia3ViZXJuZXRlcy5pby9zZXJ2aWNlYWNjb3VudC9uYW1lc3BhY2UiOiJrdWJlLXN5c3RlbSIsImt1YmVybmV0ZXMuaW8vc2VydmljZWFjY291bnQvc2VjcmV0Lm5hbWUiOiJkZXBsb3ltZW50LWNvbnRyb2xsZXItdG9rZW4tNHB6aDciLCJrdWJlcm5ldGVzLmlvL3NlcnZpY2VhY2NvdW50L3NlcnZpY2UtYWNjb3VudC5uYW1lIjoiZGVwbG95bWVudC1jb250cm9sbGVyIiwia3ViZXJuZXRlcy5pby9zZXJ2aWNlYWNjb3VudC9zZXJ2aWNlLWFjY291bnQudWlkIjoiYWJjYjVkNGMtNjNhZi00YTYzLWFiZWUtYzFlNjM1MWY1MDE5Iiwic3ViIjoic3lzdGVtOnNlcnZpY2VhY2NvdW50Omt1YmUtc3lzdGVtOmRlcGxveW1lbnQtY29udHJvbGxlciJ9.GsLEBqKdiY20-PHk2X-yspA4pcwc4hnU2_EDs_yYs362B_6EQyHeZ0a
$:>
copy and paste the token value in the dashboard connection window (in next step)
Open a SSH tunnel:
$:> ssh -L 8000:10.109.94.227:443 root@master01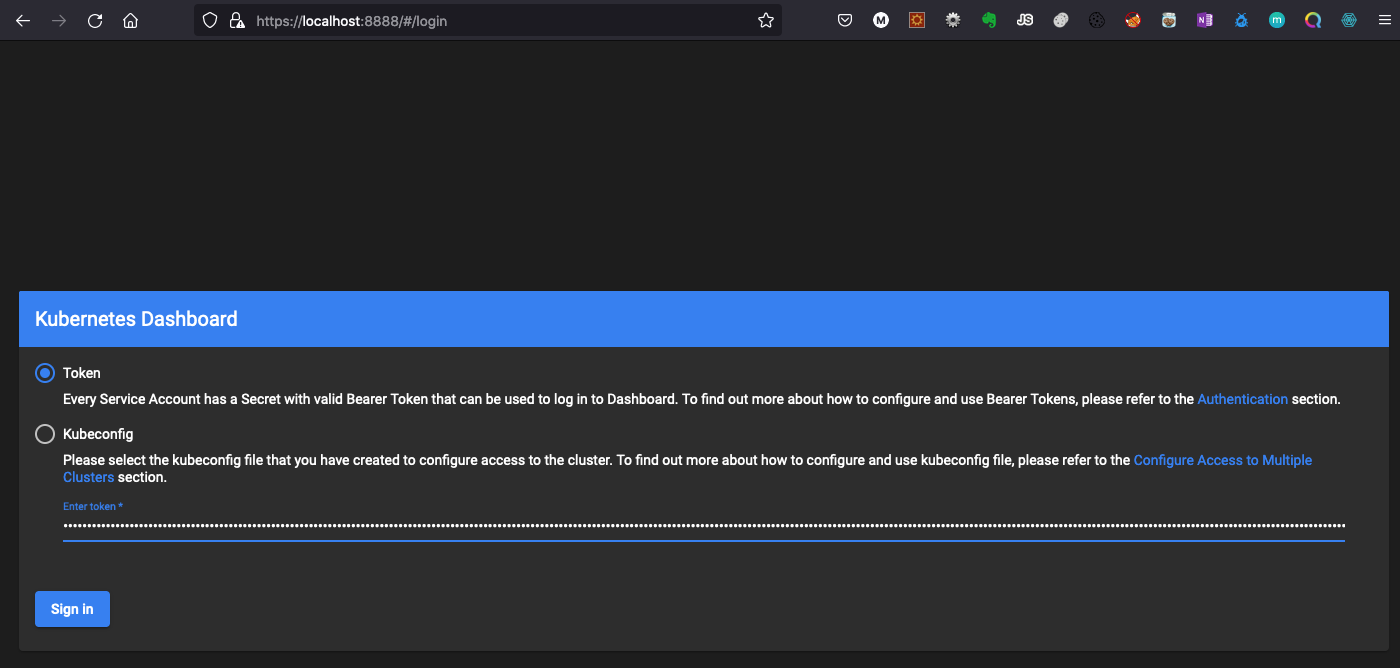
Next
Now we have a working 4-node kubernetes cluster, Enjoy !! 😀 You can deploy, test your applications …
In future articles I will deal with the following topics:
- Implementation of a Container Attached Storage (CAS) service such as OpenEBS or Longhorn.
- Installation traefik for publishing your services
- Installation Ranger
- Installation a new master node ….
Conclusion
This blog described constructing a working four-node Kubernetes cluster running on real hardware that cost under 900 €.
The goal was a touchy-feely Kubernetes installation running on real local hardware.
- Much of the work involved of assembling a physical stack of Raspberry Pi boards, followed by preparing each operating system to run openSUSE MicroOS Kubic, a Distribution that is Certified Kubernetes ,which integrates the bundle for kubernetes 1.23.4 and and uses cri-o.
- We proceeded to setup Kubernetes through a terraform workflow sent to each node.
- Remote access to our cluster through the following tools :
- kubectl command
- Lens , Kubernetes IDE from the company Mirantis
- Kubernetes Dashboard
Containers have great potential for IoT applications. Raspberry Pi based clusters could be very useful for testing and learning concepts such as microservices, application clustering, container networking and container orchestration. In this article, I’ve tried to cover the hardware and software configuration details to help you build your own Raspberry cluster.
