After my previous post about Using HELM Chart to Deploying OpenEBS to an Kubernetes Cluster using Terraform already up, I wanted to test Snapshot and Clone of a cStor Volume in OpenEBS.

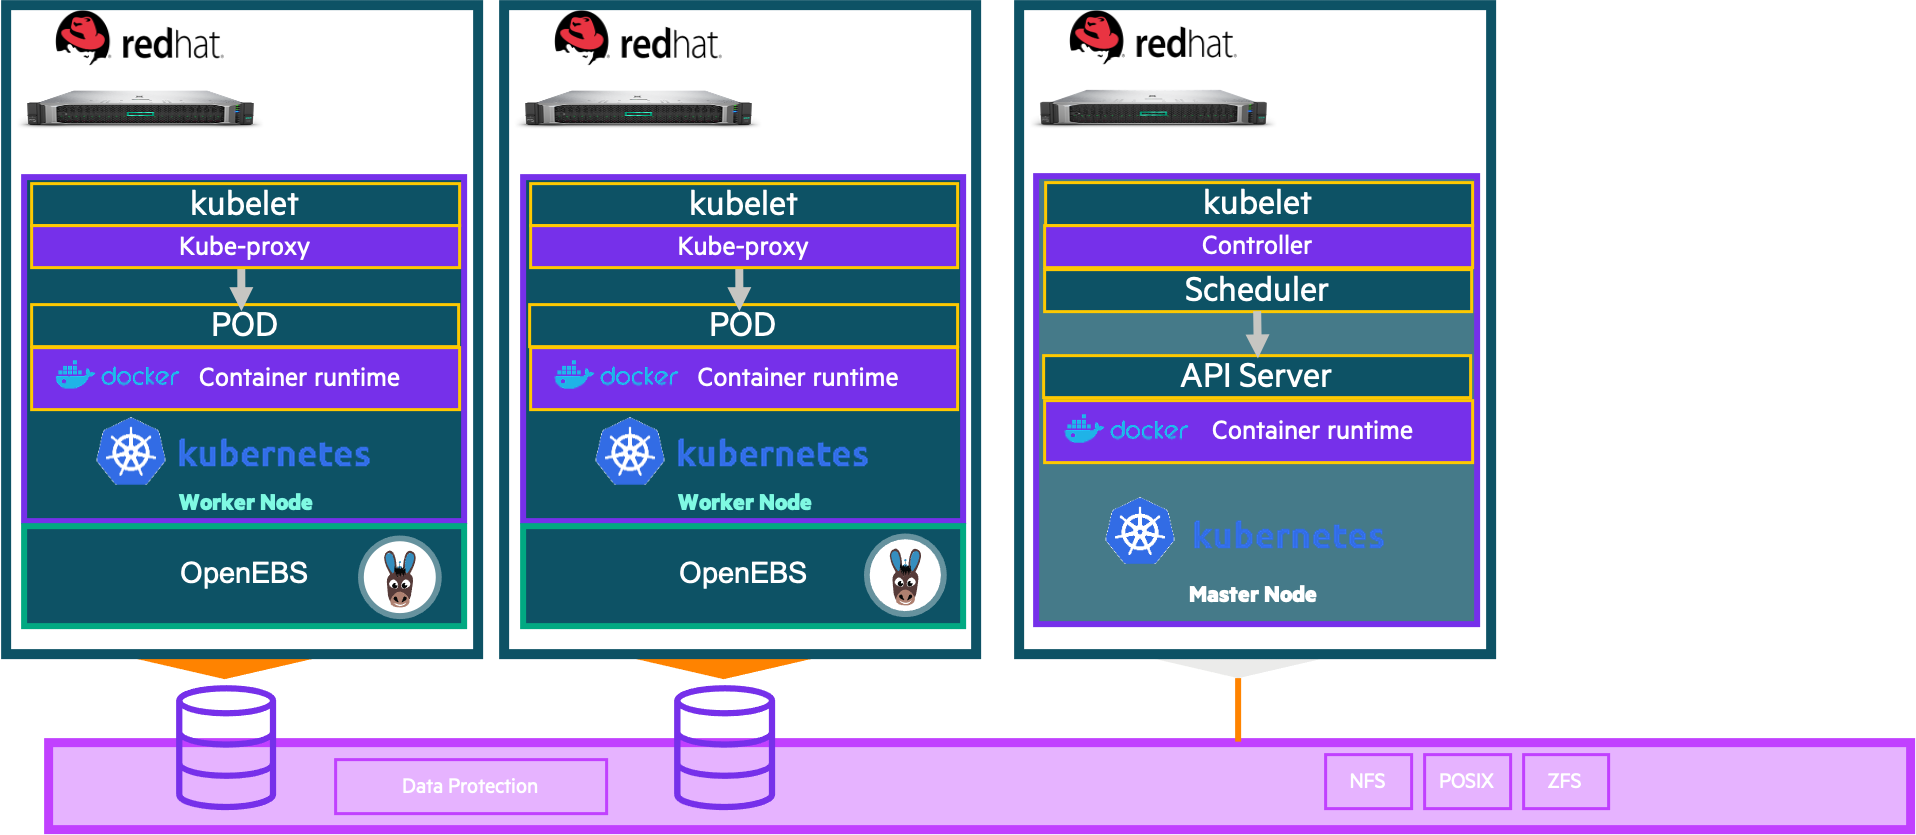
We are going to take the configuration that was set up in the previous post (I invite you to look at it if you did not follow it ) We had :
- 3 nodes Kubernetes cluster
- 2 nodes Attributes OpenEBS storage cluster installed and configured
- Storage Class defined : openebs-sc-student1
- PVC (pvc-mssqldata01-student1) used by a SQL Server instance.
In this post you will see :
- How to deploy OpenEBS with Terraform
- Creating a StoragePool
- Creating a Storage Class
- Provisioning a Persistent Volume Claim
- Deploying a SQL Server instance on an OpenEBS storage
Prerequisites
Before you get started, you’ll need to have these things:
- Kubernetes 1.13+ with RBAC enabled
- iSCSI PV support in the underlying infrastructure
- OpenEBS installed and configured
- a Storage Class created
- a PVC created
- a Microsoft SQL Server instance
Infra

Create volumes Snapshot Persistent Volume Claim (PVC)
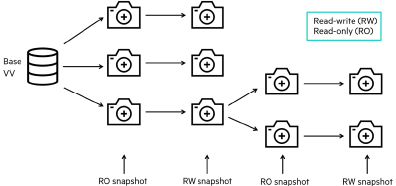
Snapshots are typically useful for purposes like audits and reporting. Another use for snapshot backups is that multiple snapshots can be created for a database, and these can be taken at different points in time. This helps with period-over-period analyses.
It is important to understand that database snapshots are directly dependent on the source database. Therefore, snapshots can never substitute your regular backup and restore strategy. For instance, if an entire database is lost, it would mean its source files are inconsistent. If the source files are unavailable, snapshots cannot refer to them, and so, snapshot restoration would be impossible.

Definition of some terms used :
Snapshot: A storage snapshot is a set of reference markers for data at a particular point in time. A snapshot acts like a detailed table of contents, providing the user with accessible copies of data that they can roll back to.
VolumeSnapshot: A snapshot request object in kubernetes. When this object is created then the snapshot controller would act on the information and try to create a VolumeSnapshotData.
VolumeSnapshotData: It is a kubernetes object that represents an actual volume snapshot. It contains information about the snapshot e.g. the snapshot name mapped by the actual storage vendor, creation time etc.
Creating a cStor Volume Snapshot
The following steps will help you to create a snapshot of a cStor volume. For creating the snapshot, you need to create a YAML specification and provide the required PVC name into it. The only prerequisite check is to be performed is to ensure that there is no stale entries of snapshot and snapshot data before creating a new snapshot.
Copy the following YAML specification into a file called vol_snapshot_student1.yaml.
apiVersion: volumesnapshot.external-storage.k8s.io/v1
kind: VolumeSnapshot
metadata:
  name: vol-snapshot-student1
  namespace: student1
spec:
  persistentVolumeClaimName: pvc-mssqldata01-student1
Run the following command to create the snapshot of the provided PVC.
$ kubectl create -f vol_snapshot_student1.yaml -n student1
$ volumesnapshot.volumesnapshot.external-storage.k8s.io/vol-snapshot-student1 created
$
The above command creates a snapshot of the cStor volume and two new CRDs. To list the snapshots, use the following command
$ kubectl get volumesnapshot -n student1
NAME                    AGE
vol-snapshot-student1   29s
$
$ kubectl get volumesnapshotdata -n student1
NAME                                                       AGE
k8s-volume-snapshot-5b96da4a-a918-11eb-8762-7a190f6375cb   63s
$
Now we can create a Clone from the VolumeSnapshot
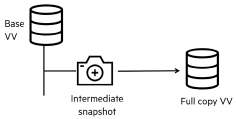
Cloning is the process of copying an online database onto another server. The copy is independent of the existing database and is preserved as a point-in-time snapshot.
You can use a cloned database for various purposes without putting a load on the production server or risking the integrity of production data. Some of these purposes include the following:
- Performing analytical queries
- Load testing or integration testing of your apps
- Data extraction for populating data warehouses
- Running experiments on the data
- Migration …..
- We will demonstrate the ability to clone directly from a PVC as declared in the dataSource.It’s also possible to create forks of - the SQL Server database to create even more sophisticated workflows.
It’s now possible to transform the data of the “test” deployment without disturbing the data of the “prod” deployment. This opens up the possibility to create advanced testing and development workflows that uses an exact representation of production data. Whether this dataset is a few bytes or a handful of terabytes, the operation will only take a few seconds to execute as the clones are not making any copies of the source data. We will create a Clone directly from an existing PVC without creating a snapshot.
The clone is a writable physical copy

To create a clone out of a snapshot is very simple. All you need to do is create a pvc manifest that refers to the volumesnapshot object.
Copy the following YAML specification into a file called pvc_mssqldata01_snap_student1.yaml.
apiVersion: v1
kind: PersistentVolumeClaim
metadata:
 name: pvc-mssqldata01-snap-student1
 namespace: student1
 annotations:
  snapshot.alpha.kubernetes.io/snapshot: vol-snapshot-student1
spec:
 storageClassName: openebs-sc-student1
 accessModes: [ "ReadWriteOnce" ]
 resources:
  requests:
    storage: 50Gi
Run the following command to create the new PVC (clone) from VolumeSnapshot.
$ kubectl create -f pvc_mssqldata01_snap_student1.yaml -n student1
persistentvolumeclaim/pvc-mssqldata01-snap-student created
$
show a PVC is created : pvc-mssqldata01-snap-student1
$ kubectl get pvc -n student1
NAME                           STATUS   VOLUME                                     CAPACITY   ACCESS MODES   STORAGECLASS          AGE
pvc-mssqldata01-snap-student1   Bound    pvc-df99ddd5-6321-4e88-a705-5b16e5f33536   50Gi       RWO            openebs-sc-student1   31s
pvc-mssqldata01-student1       Bound    pvc-2019924f-5461-4853-9d0e-d3ea272c8147   50Gi       RWO            openebs-sc-student1   9h
$
* Now we can create a new SQL Server deployment using PVC : pvc-mssqldata01-snap-student1*
For the deployment of the Microsoft SQL Server instance we will use the following YAML file: deploy-mssql-s-student1.yaml
apiVersion: apps/v1
kind: Deployment
metadata:
  name: mssql-deployment-snap-student1
spec:
  replicas: 1
  selector:
    matchLabels:
     app: mssql
  strategy:
    type: Recreate
  template:
    metadata:
      labels:
        app: mssql
    spec:
      terminationGracePeriodSeconds: 10
      securityContext:
          runAsUser: 1003
          fsGroup: 1003
      containers:
      - name: mssql
        image: mcr.microsoft.com/mssql/rhel/server:2019-latest
        ports:
        - containerPort: 1433
        env:
        - name: MSSQL_PID
          value: "Developer"
        - name: ACCEPT_EULA
          value: "Y"
        - name: SA_PASSWORD
          valueFrom:
            secretKeyRef:
              name: sqlsecret
              key: sapassword
        volumeMounts:
        - name: mssqldb
          mountPath: /var/opt/mssql
      volumes:
      - name: mssqldb
        persistentVolumeClaim:
          claimName: pvc-mssqldata01-snap-student1
---
apiVersion: v1
kind: Service
metadata:
  name: mssql-service-snap-student1
spec:
  selector:
    app: mssql
  ports:
    - protocol: TCP
      port: 1433
      targetPort: 1433
  type: NodePort
Create a new MS SQL Server instance:
$ kubectl create -f deploy-mssql-s-student1.yaml -n student1
deployment.apps/mssql-deployment-snap-student1 created
service/mssql-service-snap-student1 created
$
Check if your SQL Server instance works:
$ kubectl get pods -n student1

NAME                                         READY   STATUS    RESTARTS   AGE
mssql-deployment-snap-student1-5fc58d5c6f-v9lsh   1/1     Running   0          33s
mssql-deployment-student1-677b58bfc9-gzg7r        1/1     Running   0          20h
$
We have two Microsoft SQL Server instances running.
Get NodePort : TCP port binding SQL Server services
$ kubectl get svc -n student1

NAME                                TYPE       CLUSTER-IP      EXTERNAL-IP   PORT(S)          AGE
mssql-deployment-student1-service   NodePort   10.101.67.163   <none>        1433:30561/TCP   20h
mssql-service-snap-student1         NodePort   10.97.95.78     <none>        1433:32294/TCP   2m47s
$
Check database WideWorldImporters on two Microsoft SQL Server
In first instance :
$ sqlcmd -U sa -P HPeinvent@ -S 10.6.29.166,30561 -Q  "SELECT TOP 10 StockItemID, StockItemName FROM WideWorldImporters.Warehouse.StockItems ORDER BY StockItemID" StockItemID StockItemName
----------- ----------------------------------------------------------------------------------------------------
          1 USB missile launcher (Green)
          2 USB rocket launcher (Gray)
          3 Office cube periscope (Black)
          4 USB food flash drive - sushi roll
          5 USB food flash drive - hamburger
          6 USB food flash drive - hot dog
          7 USB food flash drive - pizza slice
          8 USB food flash drive - dim sum 10 drive variety pack
          9 USB food flash drive - banana
         10 USB food flash drive - chocolate bar

(10 rows affected)
$
In second instance
$ sqlcmd -U sa -P HPeinvent@ -S 10.6.29.166,32294 -Q  "SELECT TOP 10 StockItemID, StockItemName FROM WideWorldImporters.Warehouse.StockItems ORDER BY StockItemID" StockItemID StockItemName
----------- ----------------------------------------------------------------------------------------------------
          1 USB missile launcher (Green)
          2 USB rocket launcher (Gray)
          3 Office cube periscope (Black)
          4 USB food flash drive - sushi roll
          5 USB food flash drive - hamburger
          6 USB food flash drive - hot dog
          7 USB food flash drive - pizza slice
          8 USB food flash drive - dim sum 10 drive variety pack
          9 USB food flash drive - banana
         10 USB food flash drive - chocolate bar

(10 rows affected)
We have two Microsoft SQL Server instances with exactly the same data, goal achieved .
Conclusion
The volume clone is similar to dynamic volume provisioning. The only difference is the fact that the clone volume is provisioned through snapshot provisioner instead of volume provisioner. The advantage of openebs is that. cStor snapshots are fast because they use Copy-On-Write. Inshort when we take snapshots we are not actually copying the volume anywhere, instead cStor internally leverages the zfs to save/record indexes. Thus, both actual volume and snapshot would refer to the same block of data unless one of them updates it. OpenEBS extends the benefits of software-defined storage to cloud native through the container attached storage approach. It represents a modern, contemporary way of dealing with storage in the context of microservices and cloud native applications.
Kubernetes is moving towards CSI compliant storage spec, we will see in a next post the use of the CSI Driver for OpenEBS.
