Create Amazon EKS cluster using Terraform
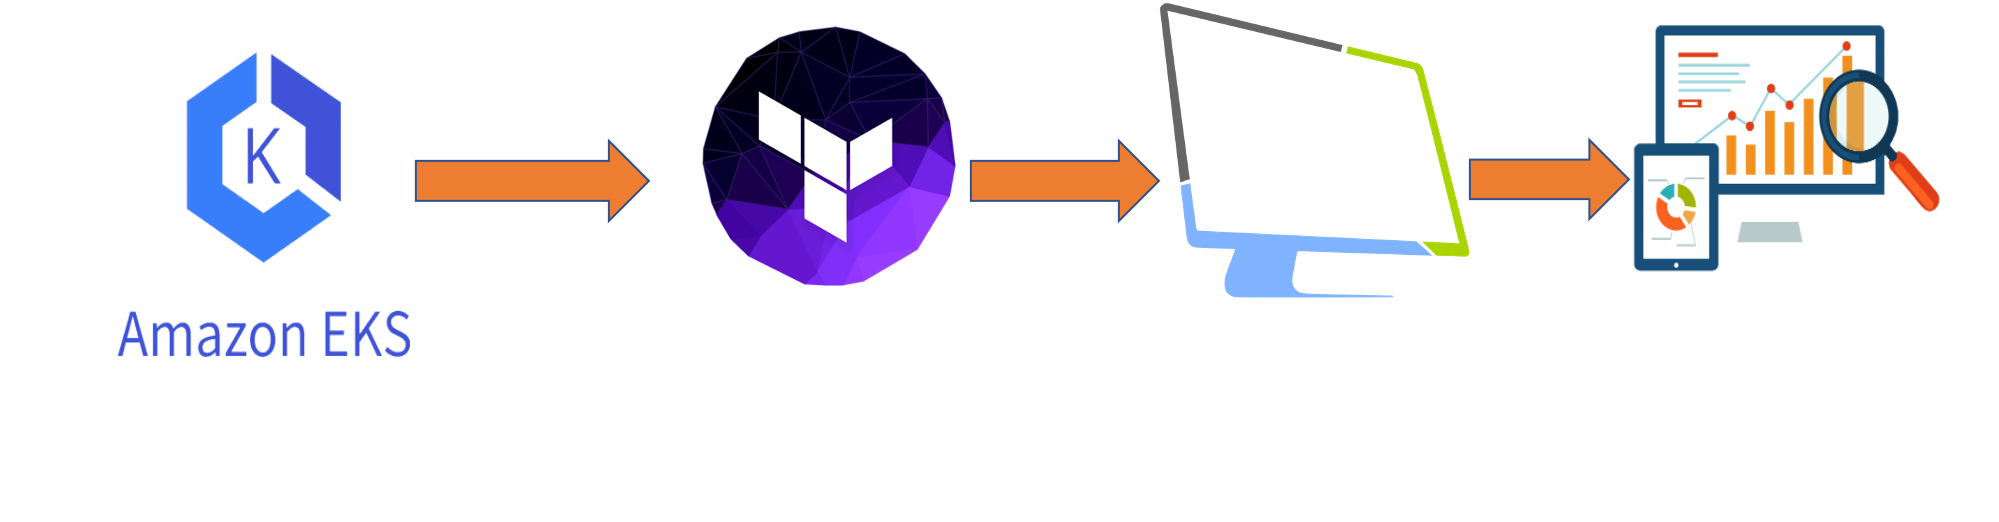
The purpose of this tutorial is to create an EKS cluster (3 nodes) with Terraform. Amazon Elastic Kubernetes Service (Amazon EKS) is a fully managed Kubernetes service by AWS.
What is AWS EKS?
Amazon Elastic Kubernetes Service (Amazon EKS) gives you the ability to start, run, and scale Kubernetes applications in the AWS cloud or on-premises. Amazon EKS helps you deliver highly available and secure clusters and automates key tasks such as patching, node commissioning, and upgrades. Customers such as Intel, Snap, Intuit, GoDaddy, and Autodesk prefer EKS to run their most sensitive and critical applications.
EKS runs Kubernetes upstream and is certified Kubernetes compliant for a predictable experience. You can easily migrate any standard Kubernetes application to EKS without the need to refactor your code.
EKS makes it easy to standardize operations across environments. You can run fully managed EKS clusters on AWS. You can have a proven open source distribution of Kubernetes anywhere you want for consistent operations with Amazon EKS Distro.
Prerequisites
Before you get started, you’ll need to have these things:
- Terraform > 0.13.x
- kubectl installed on the compute that hosts terraform
- An AWS account with the IAM permissions
- AWS CLI : the AWS CLI Documentation
- AWS IAM Authenticator : the AWS IAM Authenticator Documentation
Initial setup
The first thing to set up is your Terraform. We will create an AWS IAM users for Terraform.
In your AWS console, go to the IAM section and create a user named “Terraform”. Then add your user to a group named “FullAccessGroup”. Attaches to this group the following rights:
AdministratorAccess
AmazonEKSClusterPolicy
After these steps, AWS will provide you a Secret Access Key and Access Key ID. Save them preciously because this will be the only time AWS gives it to you.
In your own console, create a ~/.aws/credentials file and put your credentials in it:
[default]
 aws_access_key_id=***********
 aws_secret_access_key=****************************
Creating the EKS cluster is pretty easy by just running terraform apply. Clone the repository and install the dependencies:
$ git clone https://github.com/colussim/terraform-aks-aws.git
$ cd terraform-aks-aws
$ terraform init
The terraform template installs a three worker nodes cluster with an instance of type : t2.large. These parameters can be changed in the file : ek-cluster.tf
Usage
Create an EKS Cluster :
$ terraform applyAfter 15 minutes the cluster is up running
Tear down the whole Terraform plan with :
$ terraform destroy -forceResources can be destroyed using the terraform destroy command, which is similar to terraform apply but it behaves as if all of the resources have been removed from the configuration.
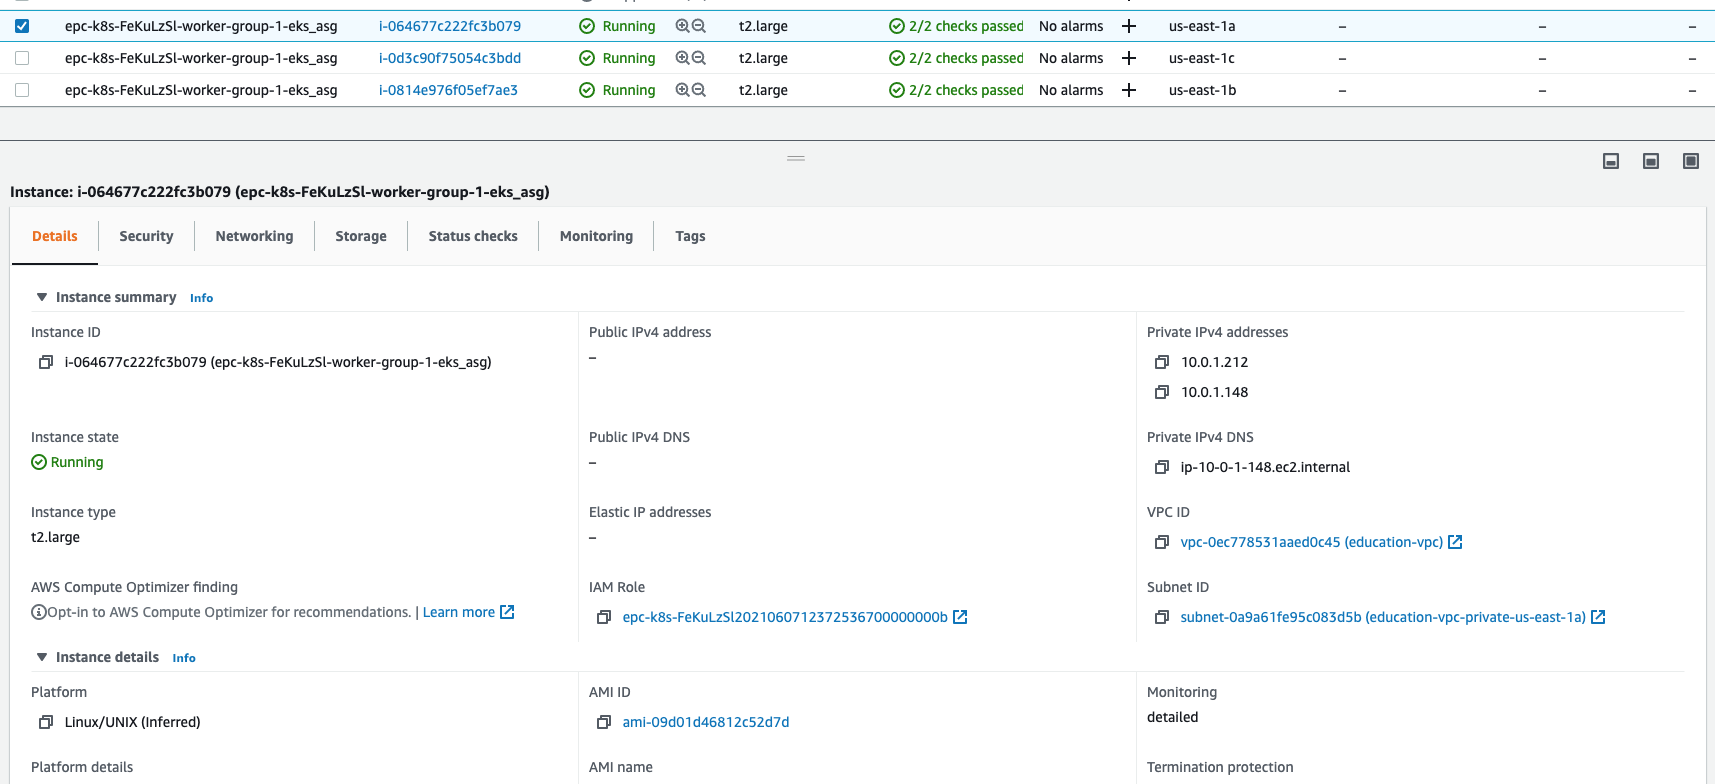
Let’s have a look at the AWS EKS console:

On the EC2 side you see three worker nodes as defined:
Remote control
Now that you’ve provisioned your EKS cluster, you need to configure kubectl.
Run the following command to retrieve the access credentials for your cluster and automatically configure kubectl :
aws eks --region $(terraform output -raw region) update-kubeconfig --name $(terraform output -raw cluster_name)Check if your cluster works:
$ kubectl get nodes

NAME                         STATUS   ROLES    AGE   VERSION
ip-10-0-1-148.ec2.internal   Ready    <none>   13m   v1.20.4-eks-6b7464
ip-10-0-2-148.ec2.internal   Ready    <none>   13m   v1.20.4-eks-6b7464
ip-10-0-3-63.ec2.internal    Ready    <none>   13m   v1.20.4-eks-6b7464
$
Deploy and access Kubernetes Dashboard
The Kubernetes Metrics Server, used to gather metrics such as cluster CPU and memory usage over time, is not deployed by default in EKS clusters.
Deploy the metrics server to the cluster by running the following command :
$ kubectl apply -f https://github.com/kubernetes-sigs/metrics-server/releases/latest/download/components.yaml
serviceaccount/metrics-server created
clusterrole.rbac.authorization.k8s.io/system:aggregated-metrics-reader created
clusterrole.rbac.authorization.k8s.io/system:metrics-server created
rolebinding.rbac.authorization.k8s.io/metrics-server-auth-reader created
clusterrolebinding.rbac.authorization.k8s.io/metrics-server:system:auth-delegator created
clusterrolebinding.rbac.authorization.k8s.io/system:metrics-server created
service/metrics-server created
deployment.apps/metrics-server created
apiservice.apiregistration.k8s.io/v1beta1.metrics.k8s.io created
$
Verify that the metrics server has been deployed :
$ kubectl get deployment metrics-server -n kube-system
NAME             READY   UP-TO-DATE   AVAILABLE   AGE
metrics-server   1/1     1            1           48s
$
Deploy Kubernetes Dashboard by running the following command :
$ kubectl apply -f https://raw.githubusercontent.com/kubernetes/dashboard/master/aio/deploy/recommended.yaml
namespace/kubernetes-dashboard created
serviceaccount/kubernetes-dashboard created
service/kubernetes-dashboard created
secret/kubernetes-dashboard-certs created
secret/kubernetes-dashboard-csrf created
secret/kubernetes-dashboard-key-holder created
configmap/kubernetes-dashboard-settings created
role.rbac.authorization.k8s.io/kubernetes-dashboard created
clusterrole.rbac.authorization.k8s.io/kubernetes-dashboard created
rolebinding.rbac.authorization.k8s.io/kubernetes-dashboard created
clusterrolebinding.rbac.authorization.k8s.io/kubernetes-dashboard created
deployment.apps/kubernetes-dashboard created
service/dashboard-metrics-scraper created
deployment.apps/dashboard-metrics-scraper created
$
To access the dashboard, you need to create a ClusterRoleBinding and provide an authorization token. This gives the cluster-admin permission to access the kubernetes-dashboard:
$ kubectl apply -f kubernetes-dashboard-admin.rbac.yaml
serviceaccount/admin-user created
clusterrolebinding.rbac.authorization.k8s.io/admin-user created
$
Get token for the connection to the dashboard :
$ kubectl -n kube-system describe secret $(kubectl -n kube-system get secret | grep service-controller-token | awk '{print $1}')
Name: service-controller-token-4jgdl
Namespace: kube-system
Labels: <none>
Annotations: kubernetes.io/service-account.name: service-controller
kubernetes.io/service-account.uid: 1c6c3808-ab59-4b36-a24c-42d8a8d566a3
Type: kubernetes.io/service-account-token
Data
====
ca.crt: 1066 bytes
namespace: 11 bytes
token: eyJhbGciOiJSUzI1NiIsImtpZCI6IkJBVGJXWllQcDZYUFBpbVU1TTBsZVVJVlUzbUs0eGYySEhaWS1aOFpFZ3MifQ.9zZXJ2aWNlYWNjb3VudC9uYW1lc3BhY2UiOiJ
rdWJlLXN5c3RlbSIsImt1YmVybmV0ZXMuaW8vc2VydmljZWFjY291bnQvc2VjcmV0Lm5hbWUiOiJzZXJ2aWNlLWNvbnRyb2xsZXItdG9rZW4tNGpnZGwiLCJrdWJlcm5ldGVzLmlvL3Nl
cnZpY2VhY2NvdW50L3NlcnZpY2UtYWNjb3VudC5uYW1lIjoic2VydmljZS1jb250cm9sbGVyIiwia3ViZXJuZXRlcy5pby9zZXJ2aWNlYWNjb3VudC9zZXJ2aWNlLWFjY291bnQudWlkIj
oiMWM2YzM4MDgtYWI1OS00YjM2LWEyNGMtNDJkOGE4ZDU2NmEzIiwic3ViIjoic3lzdGVtOnNlcnZpY2VhY2NvdW50Omt1YmUtc3lzdGVtOnNlcnZpY2UtY29udHJvbGxlciJ9.
EQMatFBqDgDocKWNTVprrfM0Bb6X3vugP9LTQM4g85i7GRg2_EMwOJgMfwbe-dGsj-VSS9UD2Ar5h7Xvu9lqMZh2w03pBnuyL5Z97gHj_ENKYMj_oS7zlfv0p-dWoR7_esl0LtqIqeyzKe3qRx4BH6hQIKqJPj9YA9sZtPzMPH6YP7hEEcwA96a0fN2NRZmcqrp0_BwfmDv3ihxEfaIy7_IvWHFlEr3aQYAaETzAv0nkyufEwkcoKvJLjeDEVPvVAC5mvcx
_uEqh0psn_GlY8a2zuZzeLN5Q1qc-MtCMT7PE-XYDEcdMnmWcy_7ZRJ9uugA6dWxXsCk00YdzkAQ8UQ
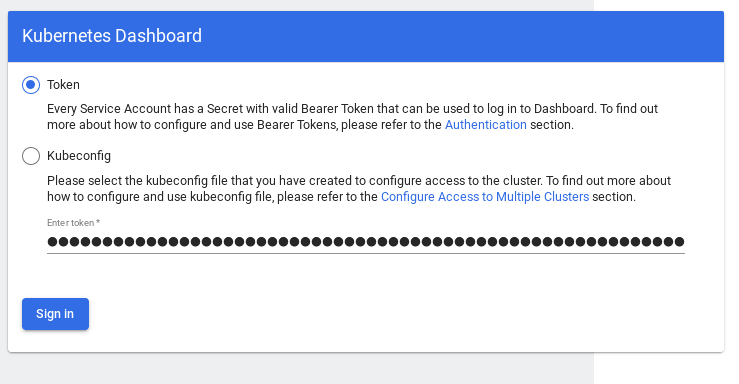
$copy and paste the token value in the dashboard connection window (in next step)
Now, create a proxy server that will allow you to navigate to the dashboard from the browser on your local machine. This will continue running until you stop the process by pressing CTRL + C.
$ kubectl proxy
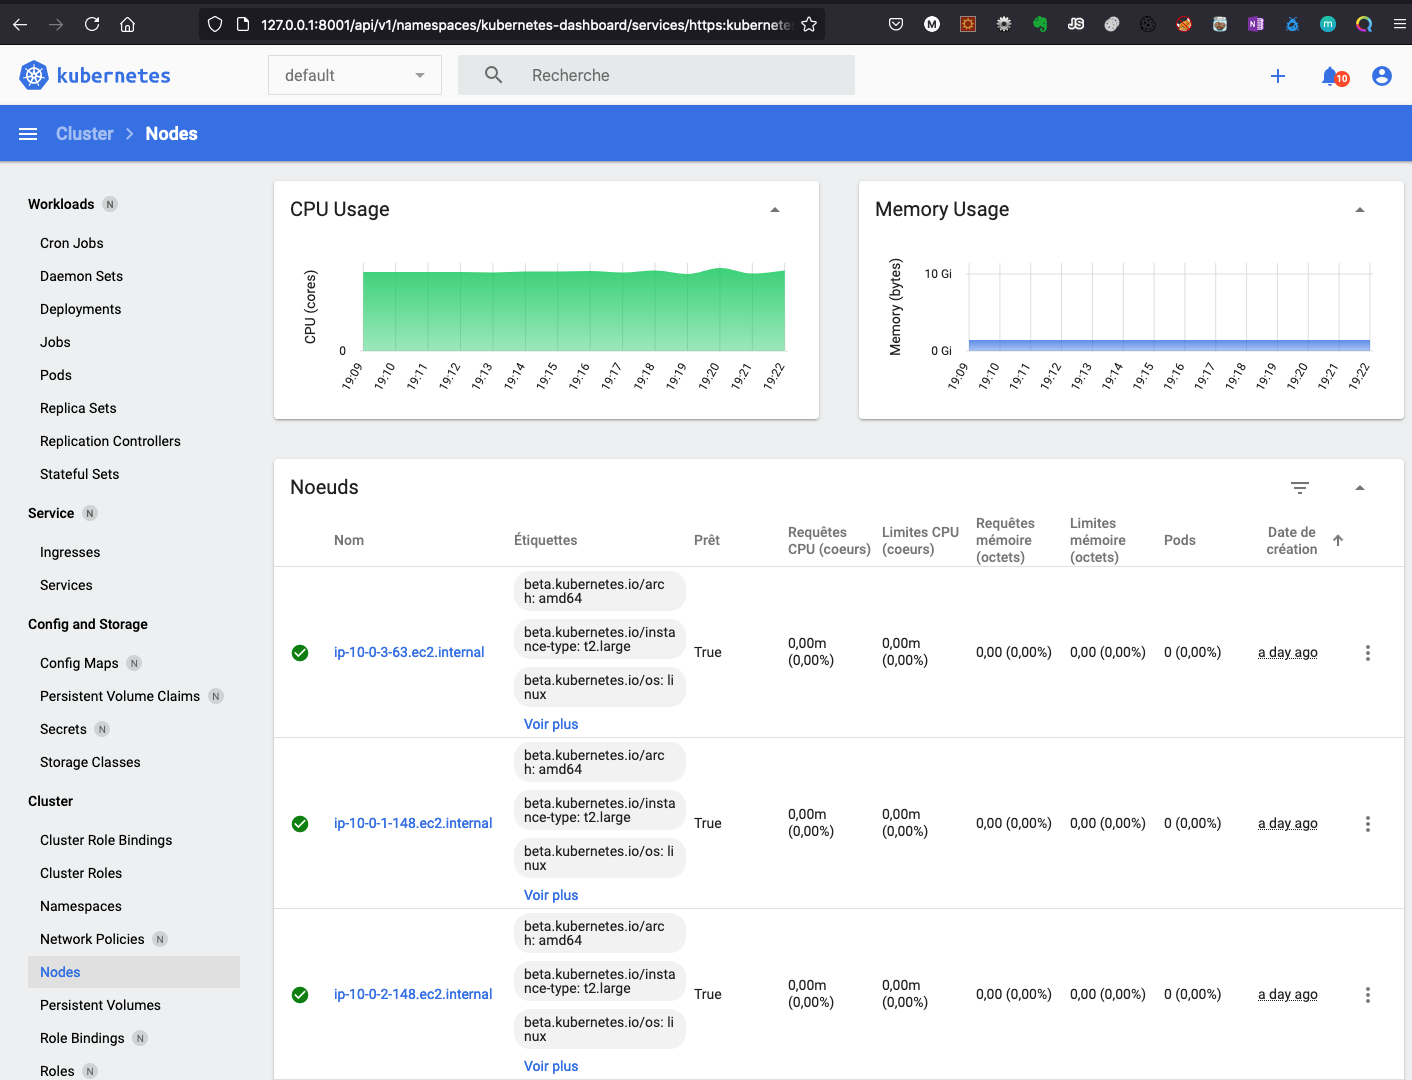
Starting to serve on 127.0.0.1:8001Now you can access the dashboard on your computer at : http://127.0.0.1:8001/api/v1/namespaces/kubernetes-dashboard/services/https:kubernetes-dashboard:/proxy/
Paste the token value :
Conclusion
With Terraform, booting a EKS cluster can be done with a single command and it only takes some minutes to get a fully functional configuration.
Next step : deploy an application in our cluster .
Resources :
 Terraform Documentation
Provision an EKS Cluster (AWS)
 AWS IAM Authenticator for Kubernetes
 AWS CLI