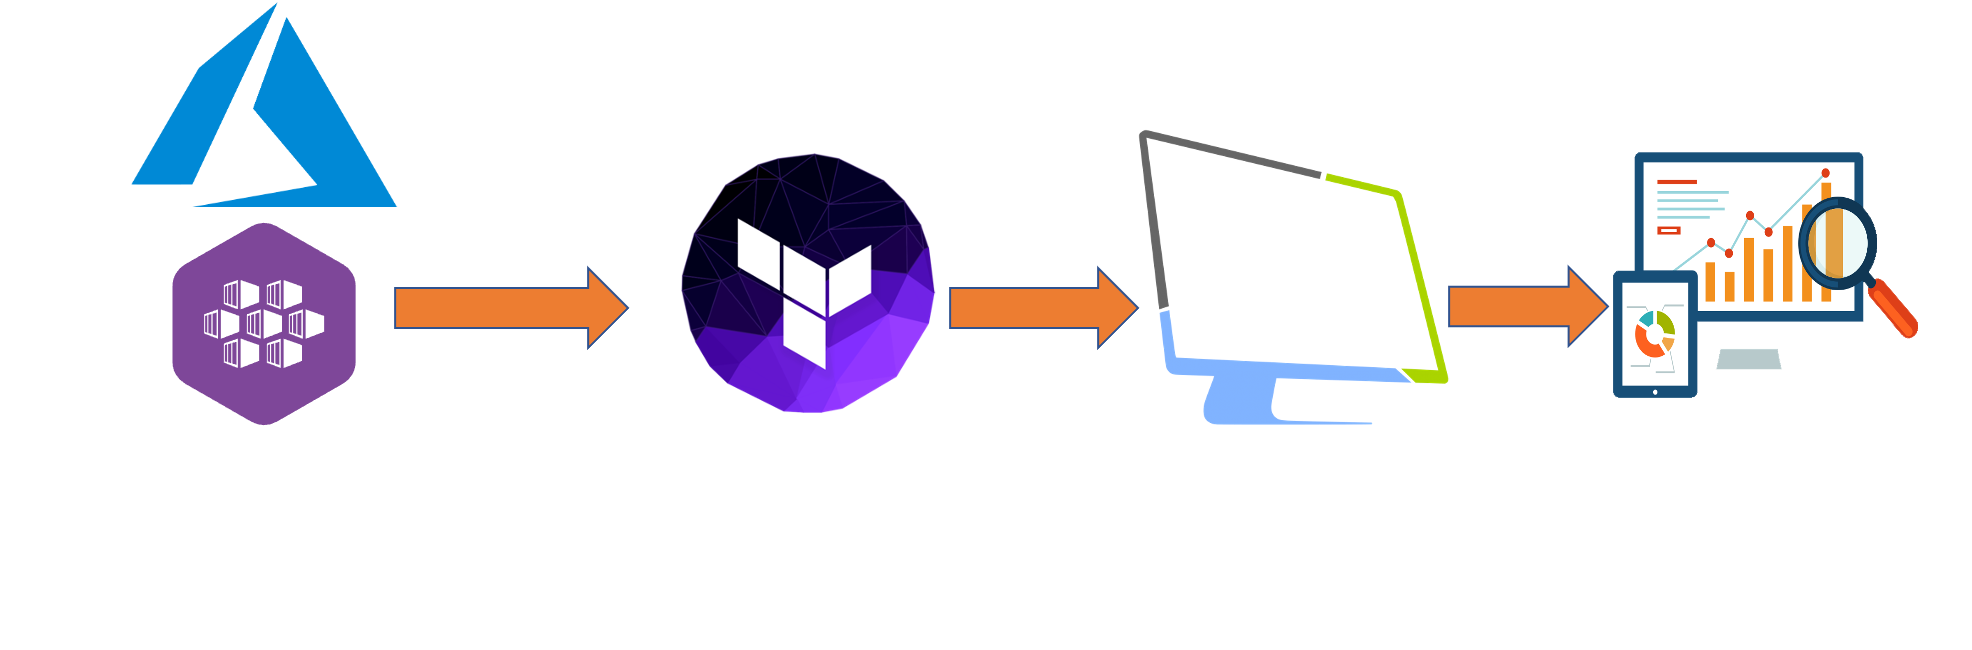
The purpose of this tutorial is to create an AKS cluster (2 nodes) with Terraform. Azure Kubernetes Service (AKS) is a fully managed Kubernetes service by Azure.
Next we will deploy a database : PostgreSQL, SQL server developer edition or OracleXE and finally SonarQube (CE, DE or EE).
I have separated this terraform deployment into 3 independent steps :
- AKS cluster deployment
- Database deployment
- SonarQube deployment
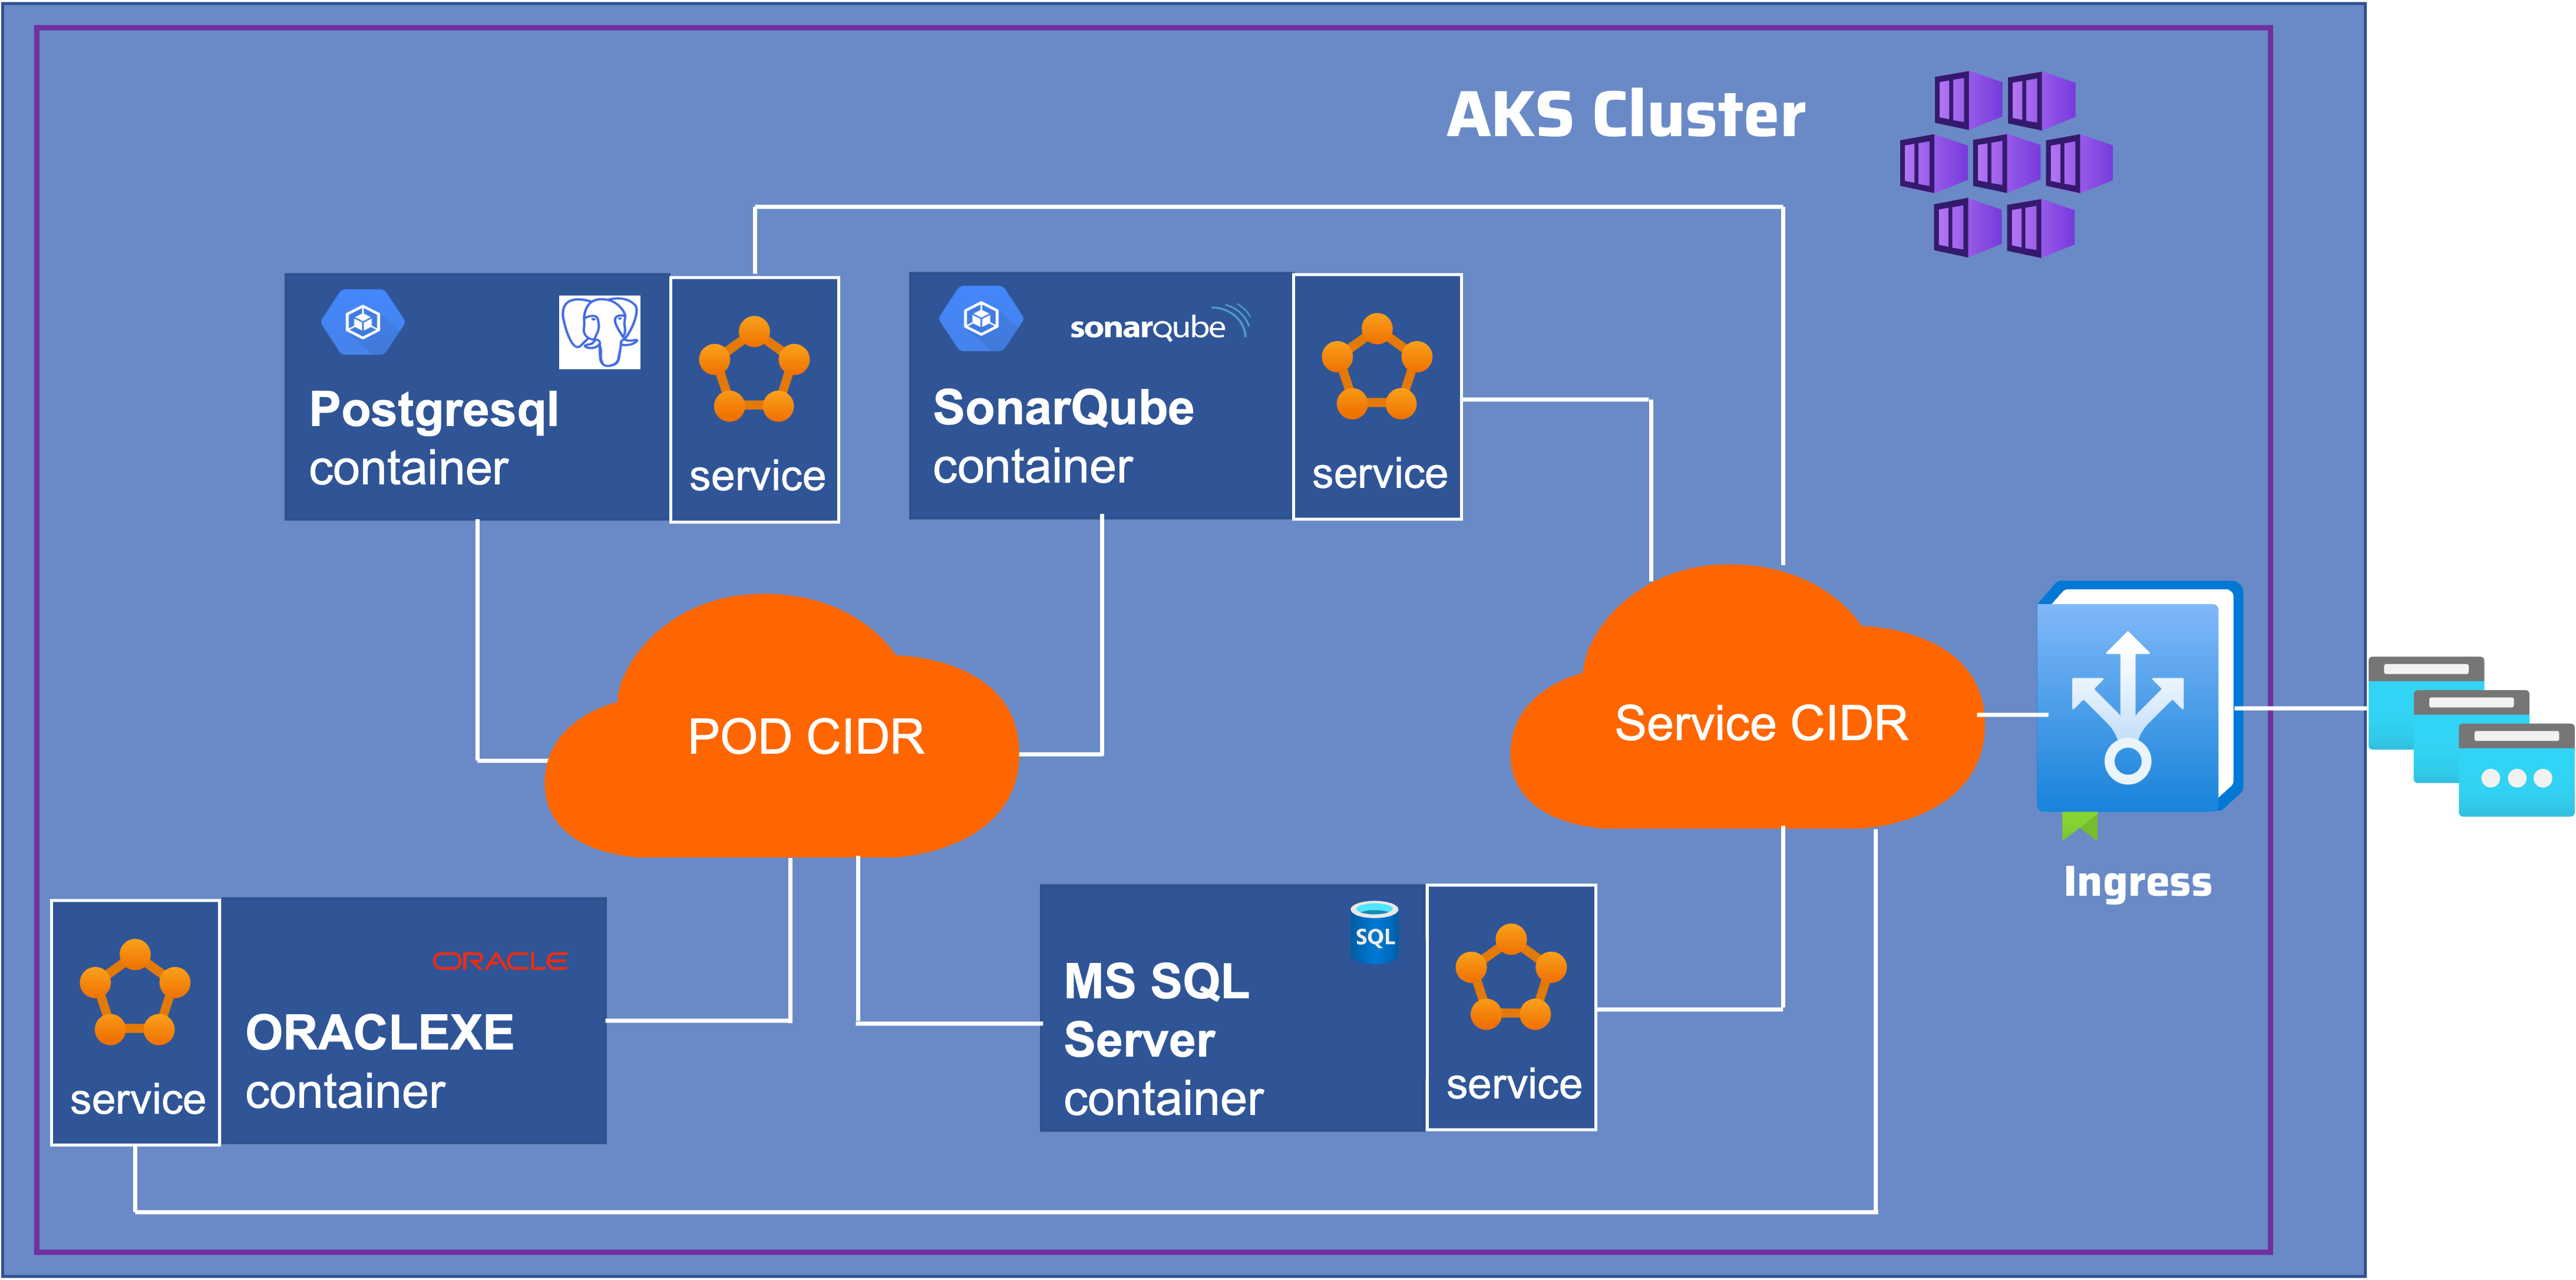
The Kubernetes cluster in a private network, and is deployed without outbound internet access. Traffic from the Internet is prohibited, with the exception of requests on TCP ports 9000 (SonarQube) and databases ports 5432 (PostgreSQL) or 1433 (SQL Server) or 1521 (ORACLE).I added in Azure Ingress Controller the access on the services : SonarQube and Database.These services will be of loadbalancer type.
Why terraform ?
Because it is a simple tool and it allows us to quickly deploy a infrastructure.
What is Terraform ?
Terraform is an open source Infrastructure as Code (IaC) tool created by HashiCorp.
A declarative coding tool, Terraform allows developers to use a configuration language called HashiCorp Configuration Language (HCL), which describes the desired cloud or on-premises infrastructure to run an application with its “end state.” Terraform then generates a plan to achieve that end state and executes the plan to provision the infrastructure.
Terraform has many advantages: it uses a simple syntax, it can provision infrastructure across multiple clouds and on-premises data centers, and it can securely and efficiently re-provision infrastructure in response to configuration changes. All of these qualities make it one of the most popular infrastructure automation tools today.
What is Azure Kubernetes Service (AKS)
Azure Kubernetes Service is a managed container orchestration service based on the open source Kubernetes system, which is available on the Microsoft Azure public cloud.
An organization can use AKS to handle critical functionality such as deploying, scaling and managing Docker containers and container-based applications.
The cluster control plane is deployed and managed by Microsoft while the node and node pools where the applications are deployed, are handled by the customer.
Prerequisites
Before you get started, you’ll need to have these things:
- Terraform >= 1.2.x
- kubectl installed on the compute that hosts terraform
- An Azure account
- Azure CLI
- An Azure service principal for terraform.
- Microsoft SQL Server command line tools (mssql)
Its initialization for our terraform workflow is in the providers.tf file in the section :
provider "azurerm" {
  features {}
  subscription_id = "xxxxxxxxxxxxxxxxxxxxxxxxxxxxxxxxxxxx"
  client_id       = "xxxxxxxxxxxxxxxxxxxxxxxxxxxxxxxxxxxx"
  client_secret   = "xxxxxxxxxxxxxxxxxxxxxxxxxxxxxxxxxxxx"
  tenant_id       = "xxxxxxxxxxxxxxxxxxxxxxxxxxxxxxxxxxxx"
}
Initial setup
Clone the repository and install the dependencies:
$ git clone https://github.com/colussim/k8sdeploy-terraform.git
$ cd terraform-sonarqube-aks-azure
$ az login
Install Azure Kubernetes Service
Do not forget to modify the providers.tf file with the following information
provider "azurerm" {
  features {}
  subscription_id = "xxxxxxxxxxxxxxxxxxxxxxxxxxxxxxxxxxxx"
  client_id       = "xxxxxxxxxxxxxxxxxxxxxxxxxxxxxxxxxxxx"
  client_secret   = "xxxxxxxxxxxxxxxxxxxxxxxxxxxxxxxxxxxx"
  tenant_id       = "xxxxxxxxxxxxxxxxxxxxxxxxxxxxxxxxxxxx"
}
Init terraform environement
$ terraform init
Initializing the backend...

Initializing provider plugins...
- Reusing previous version of hashicorp/azurerm from the dependency lock file
- Using previously-installed hashicorp/azurerm v2.99.0

Terraform has been successfully initialized!
The configuration values for our AKS cluster are defined in the variables.tf file. You can set the following parameters:
- prefix = A prefix used for all resources
- location = The Azure Region in which all resources should be provisioned
- resource_group_name = Name of ressource groupe
- owner = The Tag value for Owner
- k8sversion = The version of Kubernetes you want to install
- vm_type = The virtual machine sizes
- agent_count = Number of worker node
Please review this file (variables.tf) with your settings.
Usage
Create the Terraform plan by executing terraform plan -out out.plan
$ terraform plan -out out.plan
Terraform used the selected providers to generate the following execution plan. Resource actions are indicated with the following symbols:
  + create

Terraform will perform the following actions:
......
......
Saved the plan to: out.plan

To perform exactly these actions, run the following command to apply:
    terraform apply "out.plan"
Use the terraform apply out.plan command to apply the plan.
$ terraform apply out.plan
azurerm_kubernetes_cluster.demo: Creating...
azurerm_kubernetes_cluster.demo: Still creating... [10s elapsed]
azurerm_kubernetes_cluster.demo: Still creating... [20s elapsed]
...
...
Apply complete! Resources: 4 added, 0 changed, 0 destroyed.

The state of your infrastructure has been saved to the path
below. This state is required to modify and destroy your
infrastructure, so keep it safe. To inspect the complete state
use the `terraform show` command.

State path: terraform.tfstate

Outputs:

utputs:

az_cluster_endpoint = "se-aks01-9cb8611b.hcp.westeurope.azmk8s.io"
az_cluster_name = "se-aks01"
client_certificate = "LS0tLS1CRUdJTiBDRVJUSUZJQ0FURS0tLS0tCk1JSUZIakNDQXdhZ0F3SUJBZ0lSQU5HSHdyblhiZUNxUi8zTGxkWk8rSXd3RFFZSktvWklV0tLS0tCg
.......
=="
kube_config = (sensitive value)
run_this_command_to_configure_kubectl = "az aks get-credentials --name se-aks01 --resource-group rg-services-01"
In a few minutes your AKS cluster is up 😀.
Now run this command (as a notification at the end of the execution of your terraform plan) : az aks get-credentials –name name_of_cluster –resource-group your_resource_group to be able to manage your AKS Cluster with the kubectl or Lens command or other kubernetes IDE.
az aks get-credentials --name se-aks01 --resource-group rg-services-0Run the following command to list the nodes and availability zone configuration:
$ kubectl describe nodes | grep -e "Name:" -e "failure-domain.beta.kubernetes.io/zone"
Name:               aks-seakspool-vmss000000
                    failure-domain.beta.kubernetes.io/zone=westeurope-1
Name:               aks-seakspool-vmss000001
                    failure-domain.beta.kubernetes.io/zone=westeurope-2
Tear down the whole Terraform plan with (execute this command if you want to deduce your AKS cluster):
$ terraform destroyInstall Database
You can install PostgreSQL , OracleXE or SQL Server.
Go to the database directory and choose the database you want to install.
- mssql : Microsoft SQL Server developer edition
- oracle : OracleXE
- pgsql : PostgreSQL
Each deployment creates :
- a namespaces
- a storage class
- Persistent Volumes Claim (PVC)
- a kubernetes service to access the database
- and exposes this service in the Ingress Controller
- a sonarqube9 database
- a sonarqube user
All kubernetes settings are done in the variables.tf file.I invite you to see it to put your settings
The database creation parameters and the user’s password are defined in the following files:
- For Microsoft SQL Server developer edition : setsonarqube.sql
- For OracleXE : initpdb.sh
- For PostgreSQL : initdbsq.sh
The deployment file is :
- for Microsoft SQL Server developer edition : mssql.tf
- for OracleXE : oracle1.tf
- for PostgreSQL : pgsql.tf
You will have to modify the file providers.tf in the section provider “kubernetes” for each database deployment. You set the context of your AKS cluster which is by default the name of your AKS cluster.
provider "kubernetes" {
        config_path    = "~/.kube/config"
        config_context = "se-aks01"
        }
Each deployment displayed at the end:
- load_balancer_ip = “X.X.X.X” : IP Address for external access
- load_local_ip = “X.X.X.X” : IP Address internal for communicate with other pods
- sonar_jdbc_password = “sonarqube20@” : Password for user sonarqube in database
- sonar_jdbc_url = “jdbc:sqlserver://X.X.X.X:1433;databaseName=sonarqube9;encrypt=true;trustServerCertificate=true;integratedSecurity=false”
- sonar_jdbc_user = “sonarqube” : SonarQube user in Database
Let’s take as an example the installation of Microsoft SQL Server
For Microsoft SQL Server you must have installed the tools locally on the host that hosts your terraform. You need to initialize the PATH of the sqlcmd command The main difficulty here is to set up the docker image so that the init script runs at startup. The PostgreSQL, OracleXE docker image has a neat API where you can put sql scripts or shell scripts in /docker-entrypoint-initdb.d/. SQL Server has nothing like that, so we have to do something else. We could have redone the Microsoft SQL Server docker image and override the built-in entrypoint, but that was not the purpose.
$ cd database/mssql
$
Init terraform environement
$ terraform init
Initializing the backend...

Initializing the backend...

Initializing provider plugins...
- Reusing previous version of hashicorp/kubernetes from the dependency lock file
- Reusing previous version of hashicorp/null from the dependency lock file
- Reusing previous version of hashicorp/time from the dependency lock file
- Reusing previous version of hashicorp/azurerm from the dependency lock file
- Using previously-installed hashicorp/azurerm v2.99.0
- Using previously-installed hashicorp/kubernetes v2.14.0
- Using previously-installed hashicorp/null v3.1.1
- Using previously-installed hashicorp/time v0.8.0

Terraform has been successfully initialized!
Create the Terraform plan by executing terraform plan -out out.plan
$ terraform plan -out out.plan
Terraform used the selected providers to generate the following execution plan. Resource actions are indicated with the following symbols:
  + create

Terraform will perform the following actions:
.......

Saved the plan to: out.plan

To perform exactly these actions, run the following command to apply:
    terraform apply "out.plan"
Use the terraform apply out.plan command to apply the plan.
$ terraform apply out.plan
ubernetes_namespace.mssql-namespace: Creating...
kubernetes_secret.sqlsecret: Creating...
kubernetes_storage_class.sonarclass: Creating...
kubernetes_persistent_volume_claim.mssql-pvc: Creating...
kubernetes_service.mssql-svc1: Creating...
...........

Apply complete! Resources: 10 added, 0 changed, 0 destroyed.

Outputs:

load_balancer_ip = "X.X.X.X"
load_local_ip = "10.0.162.142"
sonar_jdbc_password = "sonarqube20@"
sonar_jdbc_url = "jdbc:sqlserver://10.0.162.142:1433;databaseName=sonarqube9;encrypt=true;trustServerCertificate=true;integratedSecurity=false"
sonar_jdbc_user = "sonarqube"
Check your Database deployment is Ok:
The default namespaces for Microsoft SQL Server is database02
$ kubectl get all -n database02

NAME                                      READY   STATUS    RESTARTS   AGE
pod/mssql-deployment01-7755b6b876-nbmzs   1/1     Running   0          2m10s

NAME                                 TYPE           CLUSTER-IP     EXTERNAL-IP    PORT(S)          AGE
service/mssql-deployment01-service   LoadBalancer   10.0.244.247     X.X.X.X    1433:30363/TCP   2m10s

NAME                                 READY   UP-TO-DATE   AVAILABLE   AGE
deployment.apps/mssql-deployment01   1/1     1            1           2m10s

NAME                                            DESIRED   CURRENT   READY   AGE
replicaset.apps/mssql-deployment01-7755b6b876   1         1         1       2m10s
After a few minutes the Database instance is up 😀
You can test your connection to Microsoft SQL Server in command line with sqlcmd or Azure Data Studio and taking as server address the address of load_balancer_ip.
Tear down the whole Terraform plan with (execute this command if you want to deduce your Database instance):
$ terraform destroyInstall SonarQube
Go to the SonarQube directory
cd ../../sonarqubeThe deployment creates :
- a namespaces
- a storage class
- Persistent Volumes Claim (PVC)
- a kubernetes service to access the SonarQube
- and exposes this service in the Ingress Controller
First step you need modify the variables.tf file.You need to set variables ( with the outputs values print at the end of database deployment):
- jdbc_user
- jdbc_password
- jdbc_url
You can also change the following variables to set the SonarQube image you want :
- sonar_image_url
- sonar_image_tag
By default SonarQube version 9.7 is installed.
You will have to modify the file providers.tf in the section provider “kubernetes” . You set the context of your AKS cluster which is by default the name of your AKS cluster.
provider "kubernetes" {
        config_path    = "~/.kube/config"
        config_context = "se-aks01"
        }
The deployment displayed at the end:
- SonarQube URL Access : IP Address for external access
Init terraform environement
$ terraform init
Initializing the backend...

Initializing the backend...

Initializing provider plugins...
- Reusing previous version of hashicorp/kubernetes from the dependency lock file
- Reusing previous version of hashicorp/null from the dependency lock file
- Reusing previous version of hashicorp/time from the dependency lock file
- Reusing previous version of hashicorp/azurerm from the dependency lock file
- Using previously-installed hashicorp/azurerm v2.99.0
- Using previously-installed hashicorp/kubernetes v2.14.0
- Using previously-installed hashicorp/null v3.1.1
- Using previously-installed hashicorp/time v0.8.0

Terraform has been successfully initialized!
Create the Terraform plan by executing terraform plan -out out.plan
$ terraform plan -out out.plan
Terraform used the selected providers to generate the following execution plan. Resource actions are indicated with the following symbols:
  + create

Terraform will perform the following actions:
.......

Saved the plan to: out.plan

To perform exactly these actions, run the following command to apply:
    terraform apply "out.plan"
Use the terraform apply out.plan command to apply the plan.
kubernetes_namespace.sonarqube-namespace: Creating...
kubernetes_storage_class.sonarclass: Creating...
kubernetes_storage_class.sonarclass: Creation complete after 1s [id=sonar-class]
kubernetes_namespace.sonarqube-namespace: Creation complete after 1s [id=sonarqube]
kubernetes_config_map.sonarqube-config: Creating...
......
......
kubernetes_deployment.sonarqube-deployment: Creation complete after 46s [id=sonarqube/sonarqube01-deployment01]

Apply complete! Resources: 10 added, 0 changed, 0 destroyed.

Outputs:

load_balancer_ip = "SonarQube URL Access : http://X.X.X.X:9000"
Check your Database deployment is Ok:
The default namespaces for SonarQube is sonarqube
$ kubectl get all -n sonarqube

NAME                                            READY   STATUS    RESTARTS   AGE
pod/sonarqube01-deployment01-6cf5597856-x89l7   1/1     Running   0          2m4s

NAME                                       TYPE           CLUSTER-IP    EXTERNAL-IP      PORT(S)          AGE
service/sonarqube01-deployment01-service   LoadBalancer   10.0.163.25     X.X.X.X       9000:30492/TCP   2m8s

NAME                                       READY   UP-TO-DATE   AVAILABLE   AGE
deployment.apps/sonarqube01-deployment01   1/1     1            1           2m4s

NAME                                                  DESIRED   CURRENT   READY   AGE
replicaset.apps/sonarqube01-deployment01-6cf5597856   1         1         1       2m4s
After a few minutes the SonarQube instance is up 😀
Tear down the whole Terraform plan with (execute this command if you want to deduce your SonarQube instance):
$ terraform destroyUseful
You can get the sonarqube logs : kubectl -n namespaces cp podname:/opt/sonarqube/logs/. . -c containername
$ kubectl -n sonarqube cp sonarqube01-deployment01-6cf5597856-x89l7:/opt/sonarqube/logs/. . -c sonarqubeShow the SonarQube logs : kubectl -n namespaces logs podname -c containername
kubectl -n sonarqube logs sonarqube01-deployment01-6cf5597856-x89l7 -c sonarqubeConclusion
With Terraform, booting a AKS cluster can be done with a single command and it only takes some minutes to get a fully functional configuration.
It is also very easy to deploy all SonarQube editions in a kubernetes environment.
Terraform makes it easy to manage Kubernetes clusters and Kubernetes resources effectively. It gives organizations the opportunity to work with infrastructure-as-code, management of platforms, and also the opportunity to create modules for self-service infrastructure.
Next steps
- Deploy a pod application
- Deploy a Sonar Scanner pod